Jig Rigging
 Rain. Real Rain, the kind that slants in and soaks your trouser legs no matter how long your duster. Rain that causes the hatless and the ill-shod to rue the shortcomings of their wardrobe, rain driving from the east sending even the racoons to shiver. A rain such as make a man question his role in life: to leave this warm bed and snoring woman to make forth, or no?
I had no such questions this day. Rendezvous with the barber surgeon, who forgoes any diagnosis and sends me elsewhere.
Until then, the mundane, past that, to The Dump where turpentine, tung and methanol flowed like rain.
GC where it was bacon, chicken with bone and skin, and Thompson’s Manly Oversized Tube Steaks packed the sack.
Toward and inward.
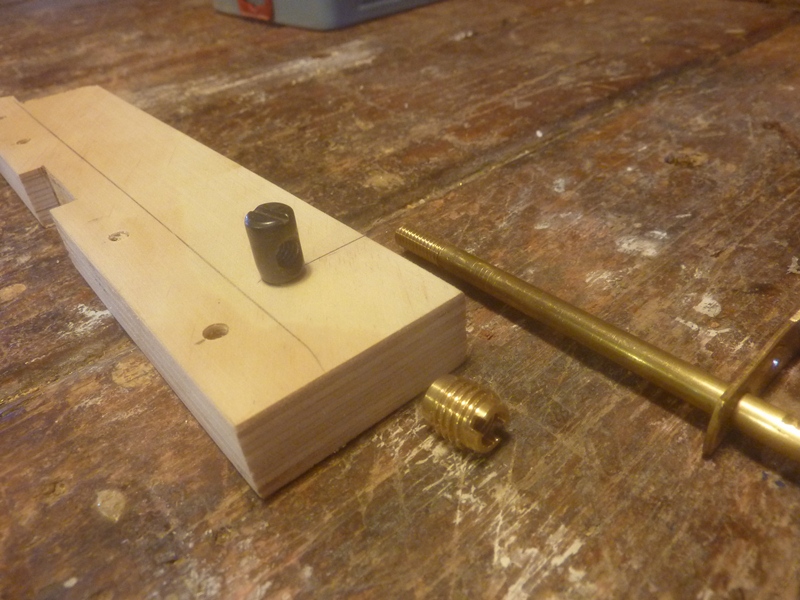
The threaded insert, now out of favor is laughed at by the dowel insert standing atop the sled fence. Ha!
Finessed last week’s 90 degree sled length gauge, changed from a brass threaded insert to dowel insert. It’s not a dowel, but it is an insert and does insert into a hole a dowel might enter, but it’s cross-drilled and threaded. Typical of IKEA assembly (and SPAR) and a cracking good invention. Praise be to him who caused it to be.
That ungainly rider on the rod is the length stop.
Here – it allows the brass rod more support. Instead of last week’s concept to cantilever the rod out the brass insert, with the dowel insert the rod has an inch and a half of ply in addition to its seat in the dowel insert. True, shortening the reach, but in recompense, improving the structure.
Just as I’m slacking around toward trammel points The Prof shows with a half case of Lag.
You get lucky sometimes
DAY –
Almost of rain, but not quite.
Even so, spotted the truck just under the gargoyles for protection in case all those green and yellow splotches on the radar plot made it across the bay.
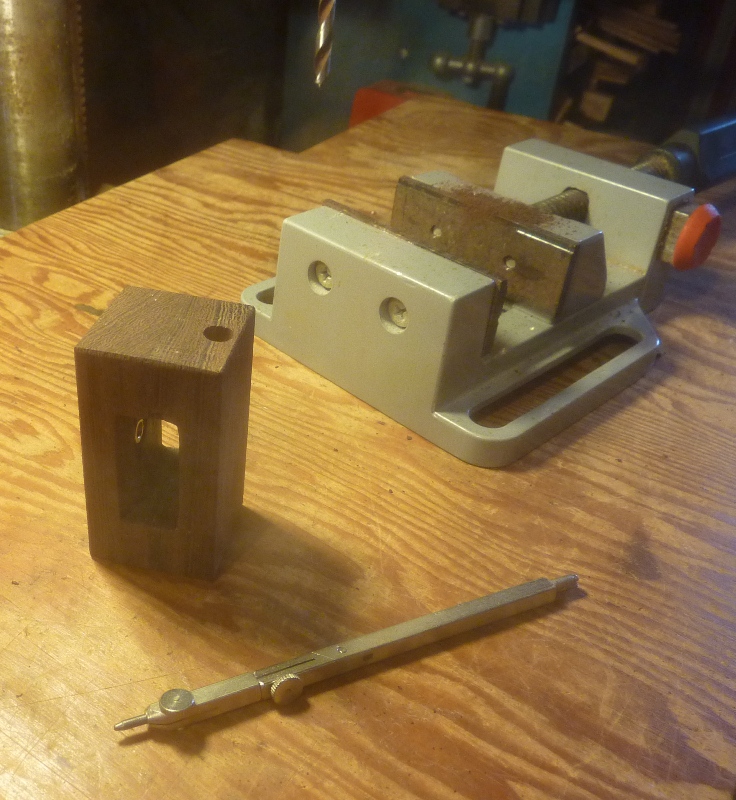
Today’s Make Work: make a pair of trammel points.
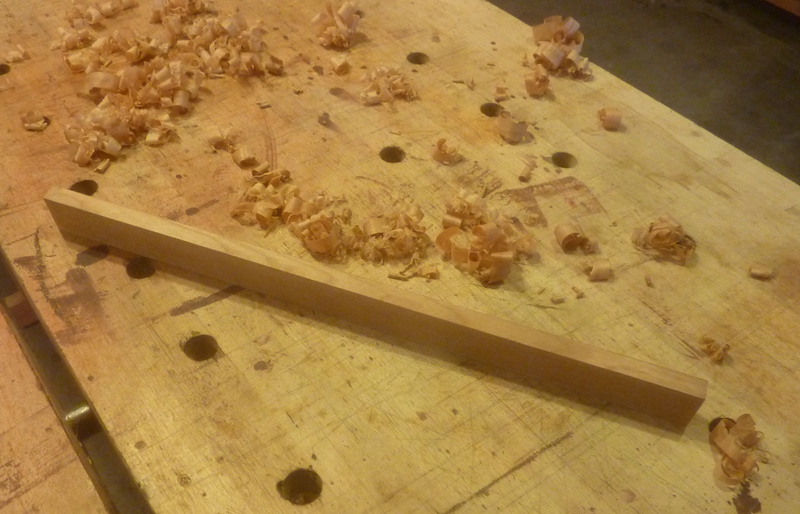
A sharp wood plane set just to shave a 128 of an inch is a pleasure to use.
There are 100 ways to draw a circle larger than that possible with a standard drawing board compass. I’ve used 17 of them and was given a ticket by the Accuracy Police for Illegal Use of hot water heater strap
First – the beam, which was quickly formed from a 16” leftover length of cherry, planed (almost) square in cross section.
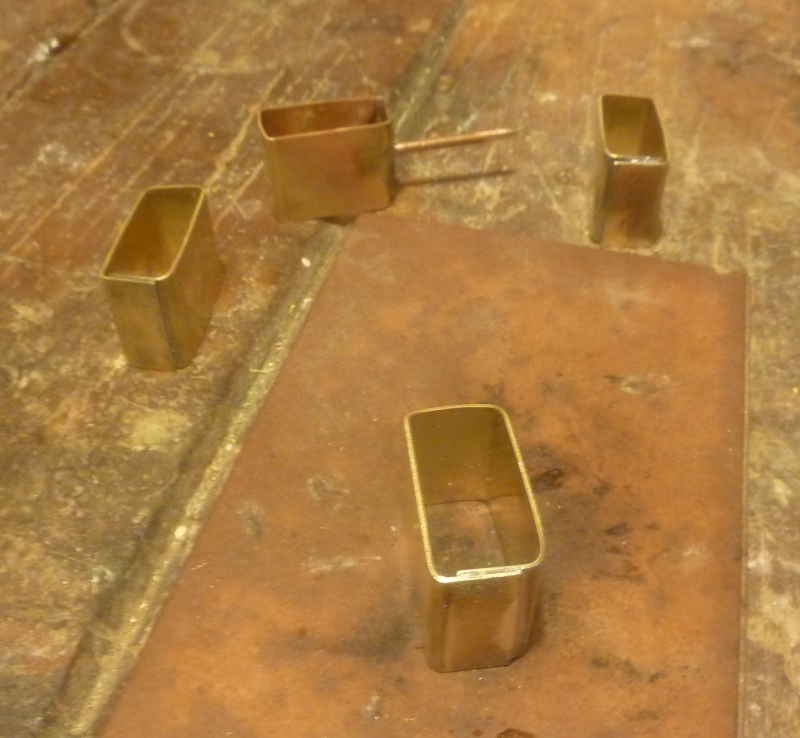
This gave me the size of the brass channel.
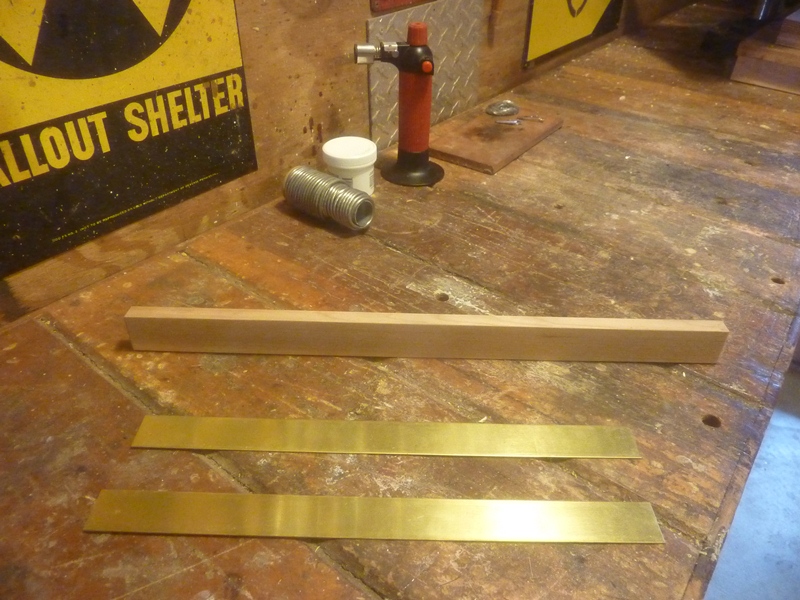
Four bends to form a hollow channel, then solder, how difficult can that be?
Brass channel that must be formed. Four bends et voila!
Trash. Cannot make the thing square, even with the agencies of the Mighty PEXTO. Solder it up anyway.
Take Two: same soup.
Take Three: even worse.
Despair sets in.
But, still have brass, so pitch in for Take Four. I’m not smart, but I don’t give in easily.
Take Four is 29.4% less odious than the prior incarnations, and so pick it and the least hideous of the prior three and press forward.
Four attempts, all foul.
What is wanted is some means to removably, yet securely spot the trammels on the beam. Small Clamps? Sure, but clumsy. What I really want is a set screw.
This mandates finding brass nuts (for which there are matching screws of some ilk) and then soldering them to the top end of the brass channels.
All good clean fun.
The dif between the set point trammel and the pencil point trammel is that the set point gets a pointy thing and the pencil trammel gets a – you guessed it – a walrus. Okay, okay, not a walrus, or even an asteroid, but a pencil. Since I didn’t know how (not using duct tape, don’t ask) to removably and adjustably lash a pencil to the pencil trammel, turned to the set point trammel.
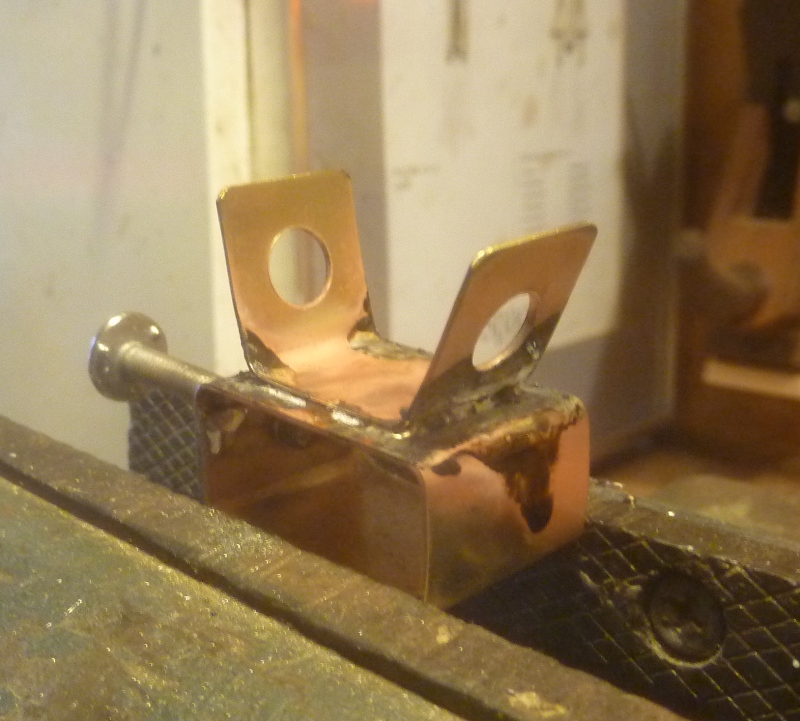
How about drilling a hole in the lower aspect of the trammel, inserting then soldering a copper nail? Nuf said.
Now, back to how to removably attach a mechanical pencil to the pencil trammel. It then occurred that instead of yet another set screw something, could solder onto the side of the pencil trammel a sort of double winged affair.
Never watch sausage being made…
Each wing with an oversized hole and bent to such an angle that squeezing the two wings together would free the pencil and allow it to be slid in and out, yet when the squeezing was released, the spring tension would be sufficient to hold the pencil.
I made this so.
It works. The last details are knobs for the set screws. One a shaved down toy cart wheel, the other finial.
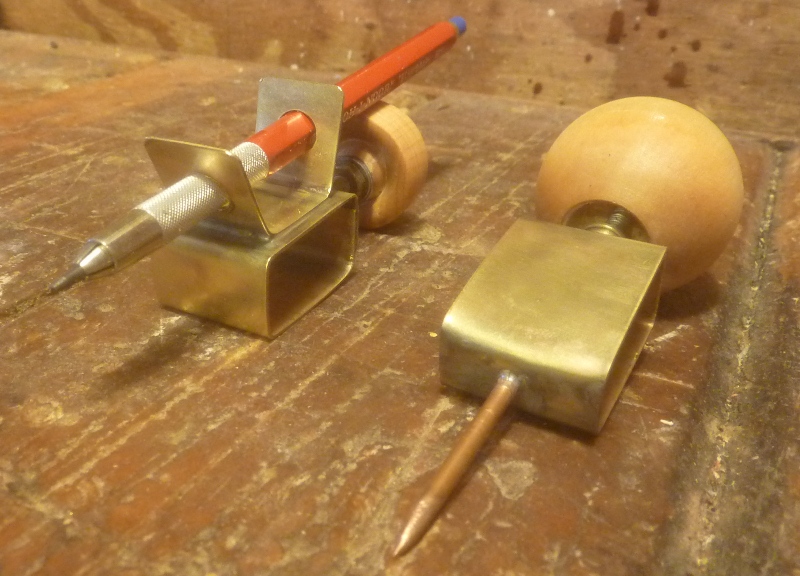
The brass trammels want only a circle to enscribe.
It looks, in the end, something like what a 17th Century wood wright would have on his bench, which is quite an advancement for JohnsonArts as most of our efforts reek of the Cenozoic crossed with Fred Flintstone.
Perfectly functional trammel points, designed to fit your shop rule (not included) can be had for $25 from all the major tool suppliers, and some of the minors.
Took me 3 plus hours to make a pair. Do the math. Good soldering practice, though…
Celebratory bacon grilling and O’booms are unconfined.
MAKEWORKDAY II –
Since yesterslack’s trammel effort was mostly in metal, today’s shall be mostly in wood, but using the same beam.
I should have used the table saw…
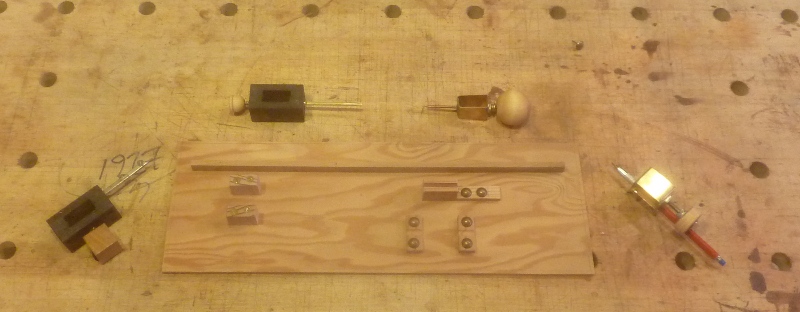
Figured for a pair of open-centered blocks that would slide on the beam, both adjustable as to position. The one mounting the circle center set point, the other bearing the pencil.
There are many ways to form the two blocks, the method I choose was to dado crosswise some rosewood the width of the dado equal to the width of the beam, the height of the dado a little more than half the beam thickness. Once formed, I cut the four ends of the rosewood bearing the dadoes and joined them together.
Just the dado on the router table – after all the fits and starts, and miscues and fence adjustments and yes indeed you really should back up the workpiece – took an hour. Had I just slapped the dado blade on the table saw I could have done the same operation, with less sturm und drang in 15 minutes. Dumb.
But now I know not to do it that way again.
And now so do you.
Glue and screw and I’ve got the two sliding blocks. And that was the easy part.

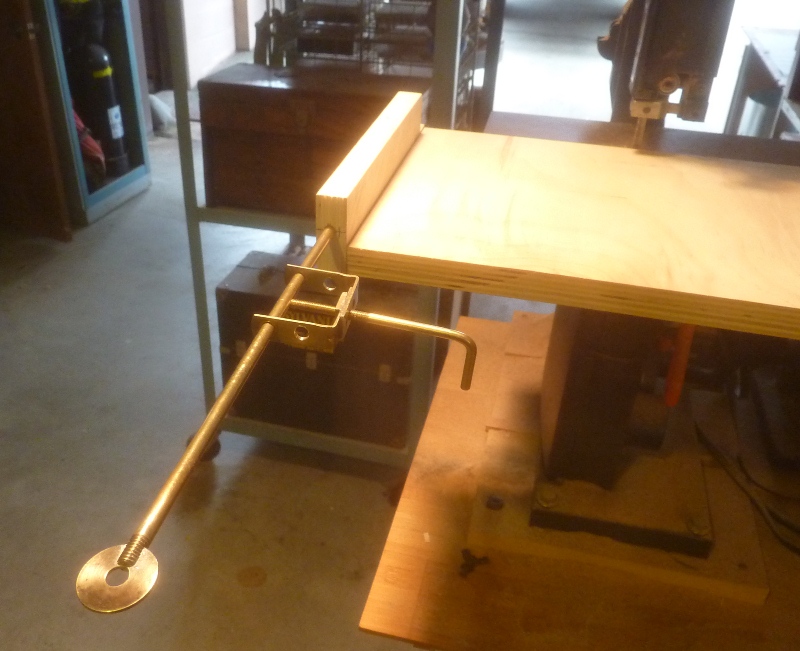
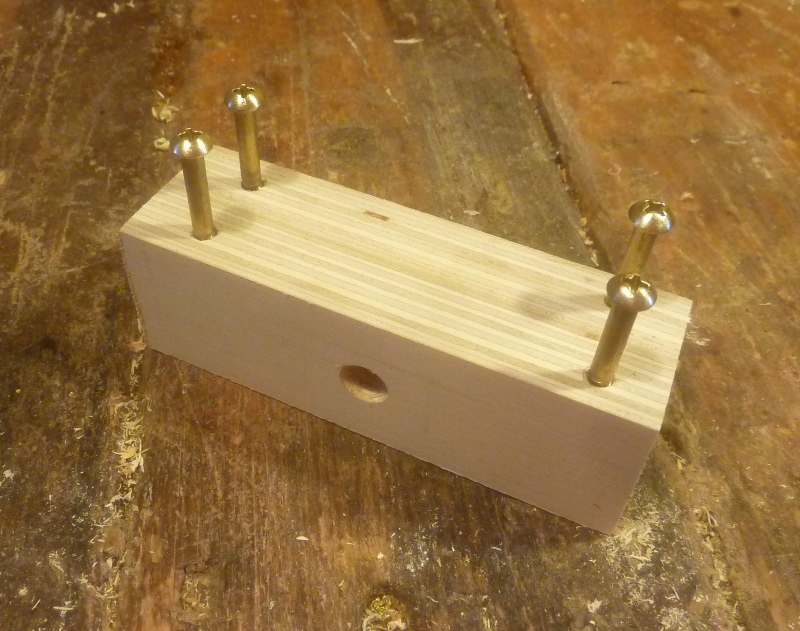
Here’s how to screw the insert into the pre-drilled block, without magic.
The locking mechanism to spot either block on the beam is a set screw via a brass threaded insert. Same with the circle center point.
If you have never tried to screw threaded inserts into hardwood – and I hadn’t – don’t.
The pathetic slot on the one end of the insert, which is supposed to enable a screwdriver to drive the insert into the wood, is as effective as Democrats reducing spending.
Either the screw driver slips out the slots and mangles them, and/or there’s insufficient purchase possible.
I fumed at this for about 3 seconds before doing the Right Thing. That is: find a bolt that fits the insert, thread it into the insert, then lock it to the insert with a nut jammed. This way, you can see you’re driving the insert in plumb and that bolt gives you something real to torque on to do so.
As I think back on this, another possibility arises: if you have a tap, thread the hole first. But the inserts I have (brass) have threads not found in my collection of taps….
Next, put threads to brass rod which in the fullness of time will, when cut and sharpened, become the center point, then put knobs on the two set screws.
The Design Committee whose responsibility it was to offer half a dozen means by which a pencil could and ought be removably lashed to the outboard block have mysteriously disappeared with half the month’s Entertainment Fund.
Suspect them over the hill at the AT&T roistering it up and purse snatching. And so no decision was made on pencil lashment. Until their return – if return they do – cannot cut and sharpen the center point as I do not yet know the height of the beam above the work surface that the pencil will determine.
But in life, we should be comfortable with more questions and fewer answers, since that’s the way it is.
MAKEWORKDAY III –
The remaining task on the wooden trammel is how to lash a pencil to the outboard piece.
Since the Design Committee has yet to return from their Pebble Beach roistering, had to plunge in myself. Was driving down the road that saw the mechanical pencil removably affixed to the brass trammel, and just before committing to an heroic exercise in fenobulating the set screw from a grill rotisserie spit, chanced to look over my extant compass parts. Not the vintage/nearly antique sets, but the contemporary compassii just lazing around, not earning their keep.
Turns out that I have a extension arm with a pencil lead holder from a compass. If I could elegantly affix this to the outboard trammel, all would be lovely. And I can, although elegance took a back seat. By drilling an 11/64” hole from bottom toward top of the trammel, the compass extension slides in an seats snugly.
My drill press, wandering as it it, was still up to the challenge. Ungawa.
But, ma foi, can I drill a 0.17 cm hole 6+ cm deep through the side of the trammel, which is a lean 0.38 cm wide?
Sure I can, this being rosewood even an 0.11 cm margin on either side of the hole is no cause for the fantods. Once done, the compass extension slipped into the hole and stayed put, just like I like it.
Tung oil to all the wood parts followed, free tung oil from The Dump and you never know what you’re getting off the Toxic Table until you drink it, but this tung seems perfectly fine. One for our side.
Yet stormy clouds hover o’er our happy scene. These new tools will rarely be used thus need not occupy prime real estate. What then?
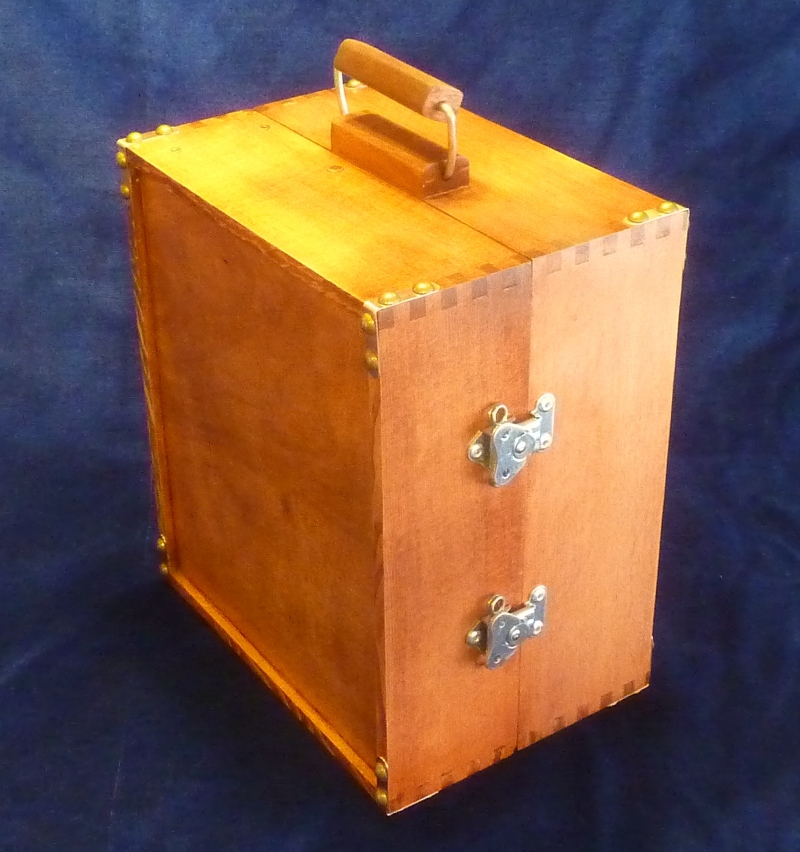
What else? A box – all good (and even not so good) tools deserve a home.
Had on hand many, many spare parts from the lock mitre joint self-tutorial of two months ago. The long sides are just the 44 cm length needed, and can shorten the other sides IF I can once more set up the vertical router table with the lock mitre bit.
Odin Be Praised, I had left the back up slat on one of the router table sleds and so simply adjusted the bit height to match that profile and I was good to go.
Like a bird building a nest, I do so enjoy making little tool nests.
Out to the Slack Deck and the table saw (in the happy, delicious drizzle) to dado the parts for a floor, then cut said floor.
But wait, there’s more fun. Instead of gluing the box together, took two steps back and opted to fit out the floor for the holdfasts for the beam and trammels before assembly of the box. Good school.
The holdfasts? Simple shapes tailored to the nature of the trammels fabricated and installed all the while thinking (mostly) good, clean thoughts.
Box then was glued up.
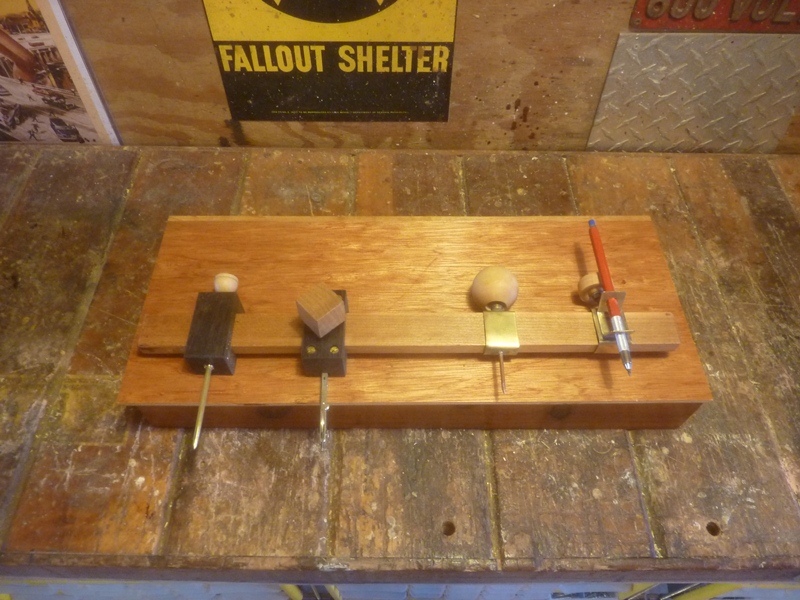
Atop the box, the two trammel styles eagerly await their first circle marking commission.
For a lid had on hand a shelf that never made it into a cabinet, a thin ply sheet bolstered with a front trim edge and an undercenter support slat. Once installed, it won’t make the Easter Parade, but it’ll be good enough.
Here’s the class picture of the two trammels in their new home.
I wish I was.
NEXTDAY –
After gulping the methotrexate recently prescribed for my sausage fingers, was hoping for more psycho-exciting results, but it just made me nauseous.
The Dump: Worst Slump, even the Toxic Table sported no left-over chemotherapy poisons.
Grocery Cheaplet where even though it was not Senior 10% Off Wednesday even the Owner manned, disably, the register
Ka-Nob Hill for a better class of fruit and the usual Palermo Rolls and out for under a Ham.
Finally – Open The Shop after a too-long hiatus.
And to a project that could be a game changer here at JohnsonYarks – a design for a no-setup box joint jig.
In working through Dwayne Eller’s vids, not one of which is not worth watching, the sidebar offers other tempting educations, one of which was Ed Stiles and his Box Joint Jig.
Ed is a treasure and his linear controllable, incremental home brew box joint jig offers, if it can be recapitulated here at JohnsonArts, the design and implementation flexibility we heretofore could neither afford with retail jigs nor did exist.
I have to extrapolate some of the finer bits of Ed’s jig. Ed is front and center behind his (estimable) table saw over in El Paso while the camera sits in the Milwaukee suburbs, but I think I get the main point. Main point being a sliding saddle that holds the workpiece, it sitting and sliding on the main fence; the advance of the workpiece in increments provided by a cam lashed to a threaded rod.
And here’s the beauty of Ed’s Sled: that threaded rod is 16 threads per inch. Thus one turn of the threaded rod moves a saddle, if that saddle is properly enjoined to the threaded rod via …. something… moves exactly 1/16 of an inch.
Diagrams Not Shown Here.
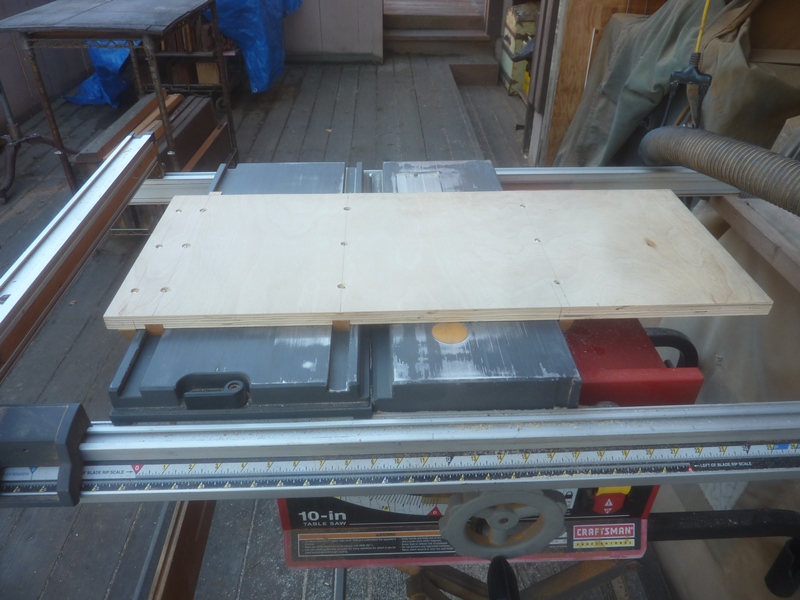
I’m just trying to surround the wonderful idea myself; and the first step (I’ll make up Step 1.34 as I go along) is to build a sled.
A sled that will slip along the top of the table saw.
Why is this important to JohnsonArts?
I have a Rockler jig for the router table that makes fine box joints for materials over 1/4 “ thick, but doesn’t allows box joints in plywood – router bits shatter the ply, at least here they do.
It is also restrictive in that there can be no spacing other than the set of the chosen spacer. You get 3/8 inch box joints 3/8 inch apart.
What I want is not only to cut box joints in thin ply, but to vary the spacing on the joints themselves. Cut two joints and then maybe skip 3/4 of an inch and then pick up the pattern.
Can’t be done with the router jig I have.
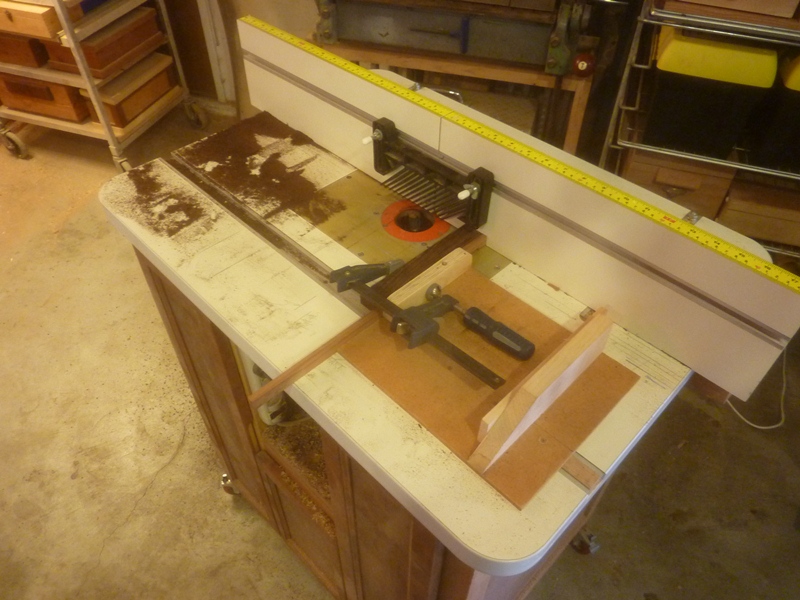
Ed’s Sled with runners and side sponsons that allow the sled to be moved back and forth athwart the table saw.
Maybe Ed’s does.
And so the afternoon is given over to merry plywood cutting, dadoing and in the end forming a sled that slides across the table saw top. This sled the foundation for all that is to come.
Not much to look at, like an afternoon at the Norfolk shipyard where they’re laying the keel for the USS Snowden. Yawn. Check the watch. Bars open yet? In Barbados.
Yowsa.
DAYO –
Pleasant Teresa dream, for a change. She’s cutely dressed in a red and white polka dot skirt, blouse and short jacket, but too skimpy (YAY!) for this kind of English winter, so she needs snuggling up (to). We go off driving into the sullen gray skies, somehow leaving the one lane road into the fen does not impede us, although I am fraught to re-find the metalled path, which we do and arrive at a Christopher Wren 1715 church which I am keen to explore while I explain to Teresa the significance of his architecture.
From dreams to the dreamy, foggy morning and eventually sloth-born by my crack squad of Bradypodidae on litter down the garden path to The Shop.
To Ed, the Ed of The Sled.
Unsure of how to proceed, clap an end piece on the sled where the dado blade will slice the sled apart if not applied.
Now what?
The Fence, that’s what. It’s a 15 cm wide slag of ¾” ply up on end athwart the sled.
And a fence that spans the sled against which any of the box joint elements will register. This fence must be, if this jig is to be effective, exactly no fooling 90 degrees to the dado blade. How to ensure this?
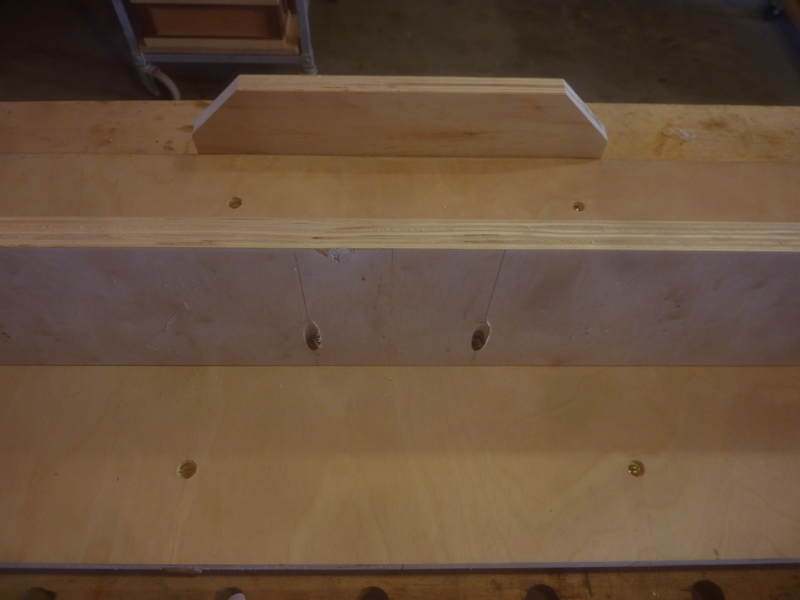
Did my best to pocket hole the main fence to 90 degrees against the table saw blade. Pocket holes: Baal Be Praised!
I have a help-mate: the table saw fence. Clamp the Slack Deck Square to the fence and then pocket hole the jig fence to the sled. Is it 90 dead bang?
Dunno.
Turn to the saddle that slides atop the fence: two slabs of ¾” ply. A pair of 36 x 12 cm slab of ply to ride on either side of the top of fence space just enough to slip north and south.
These done, turn to the hardware question: do I have the 16 threads per inch (tpi) necessary for the Real Magic?
I do not.
ACE Hardware does, and has the nuts, and other ephemera not only needed, but desired. $12.59.
Just as I’m honing in on the saddle The Prof, with his usual excellent timing arrives and we taste the newest Lagunitas: Brain Muggle at 9.4% EtOH.
There must be frats at Petaluma State which require plebes undergo at least 3 emergency room visits for alcohol poisoning.
We are less poisoned than offended, O’boom softens the pain.
When did it not?
JIGDAY –
Those dreams of showers in the back bedroom closet and the teeth spit out, which look like miniature human skulls, ought to have clued me that this was a dream. But they didn’t.
Other adventures beckoned, such at the desktop computer, which as been balky since the last spit-shine tune-up 6 weeks ago and since the last almost-catastrophic failure 6 months back, this AM refuses to turn on. Not just refuses to boot, won’t even get to the point where it refuses to boot. Yellow blink, blink, blink.
Last time, it was the RAM cards loose, or so they tell me at PC People, which I would like to aver, has saved me $$$$ of dollars since kyrons ago they kept the box running and I had not to spoil for a new Dell.
This time, I unharness the processor, maybe it’s just …. as we say in the trade, loose. Unharnessed, gazed upon, re-installed. No change. Yellow blink, blink, blink.
Marvelous.
Toss on a kimono, toss the reluctant box into the haybailer and YA Mule into the village where to consult with the PC People shamans.
Lucky, I’m first in line and geek girl thinks it’s the power supply. Can’t blame her for trying, but it wasn’t much of an effort as power supplies are the most reliable sub-components of any desktop.
I leave the errant tool in their capable hands. It’ll be Tuesday at earliest.
Castle toward and langour toward The Shop.
Another coat of tung on the trammel box, then the real excitement – Ed’s Sled.
The t-nut is securely embedded in the midst of this double wide ply block.
A. clap together, after counter-setting for the T nut, the main magic maker: the driver for the sliding program.
B. thread into the main magic maker the 3/8″ threaded rod so as to ascertain the penetration of the back braces.
C. form the left and right upright braces the either side of which shall be the cam on the left and the crank on the right.
M. install the braces
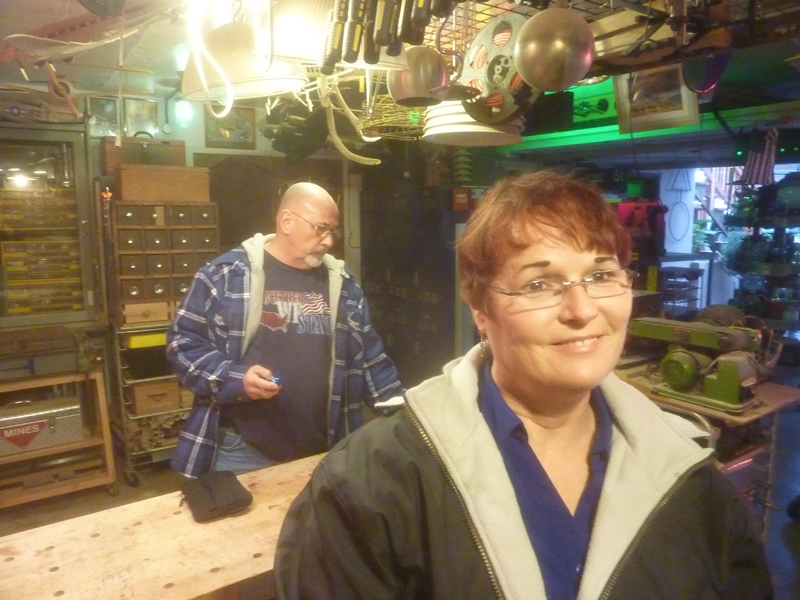
The Lovely Kelly, and her Familiiar, Chip in the background, has never take a bad photograph, and this, today, in spite of her chronic back pain.
R. Enjoy the arrival of the Lovely Kelly and Chip in for merriment, and then, as if the gods willed it, The Professor.
JIGDONEDAYAY! –
Now for the real magic. The threaded rod must be anchored at either end, and at one end is a cam, and at the other, a crank.
The crank turns the rod, the cam establishes One And Only One Turn of the crank.
I’ve installed into the ply braces steel sleeves so that the threads of the rod do not cut into and degrade the ply and against the ply braces will go a pair of locked nuts that will ensure that only the saddle moves and not the rod.
Now, for the cam that registers each revolution.
HDPE would be the industrial go-to, but I have none in the desired thickness, but I do have some maple.
How to form a cylinder?

That’s a nail in the sliding platform and on that nail registers the workpiece – you slide the platform into the blade, and then turn the blank.
Maybe not easy, but we know how here at JohnsonArts Jig Parts – use the circle cutting jig on the band saw.
The diameter is just such that the cam can be put to the eastern end of the threaded rod and still clear the fence braces. A mere bagatelle to cut the flat side making a cylinder into a cam.
Likely need a more powerful spring.
We fall down here a little bit in affixing the cam to the end of the threaded rod – we double nut the thing and jam the nuts together. Shabby.
Yet here is the cam, keen to do what cam’s do.
We next turn to the west end of the jig – the crank.
It’s a cut-off length of garage door apparatus, and again, instead of best industrial practices, I lame off with jammed nuts. Better would be to drill and cotter key, even better would be to weld a locking collar to the arm. Likely the follow-on step. No need to stay tuned….
Utterly insufficient and worse, preventing the rod from turning whilst trying manfully to lash the crank to the rod all the while keeping the cam directly against the register was unpleasant to experience.
Be glad you didn’t have to watch.
Ed’s Sled – built to the best of my ability. A normal mook would instantly put some wood to the thing and test it out. But I don’t.
Something to look forward to, yes?
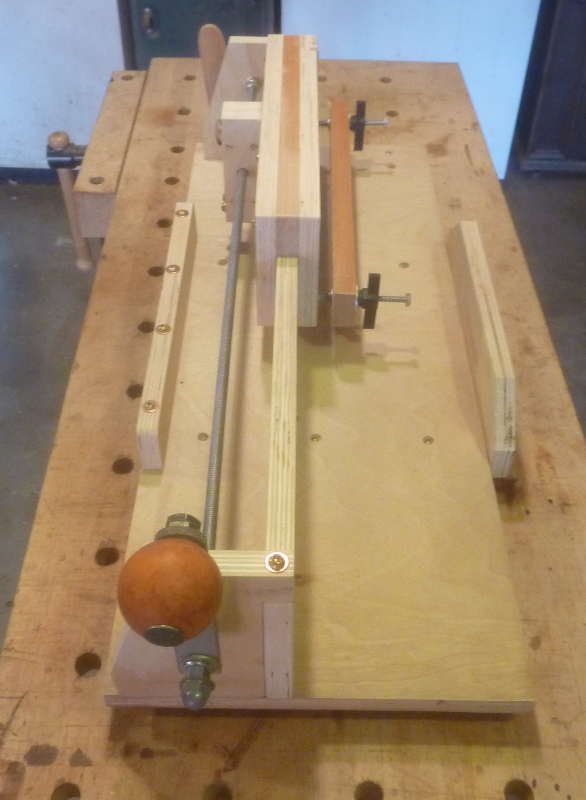
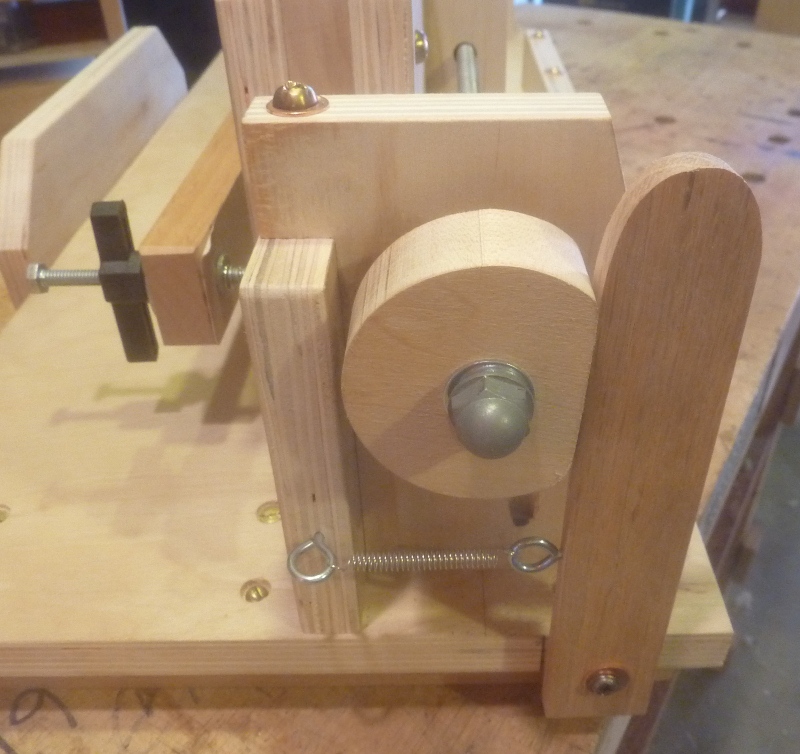
Crank-end view of the box joint jig looking along the main fence with the sliding saddle atop, that’s a sort of clamp mechanism for the intended workpiece under those black wing nuts.


 Western Flyer Nail Display Case
  Whirling Dervish
  The New Antique Mono-stereo Transpoly Morpholizer
No comments yet.