Roll Top Desk Restoration
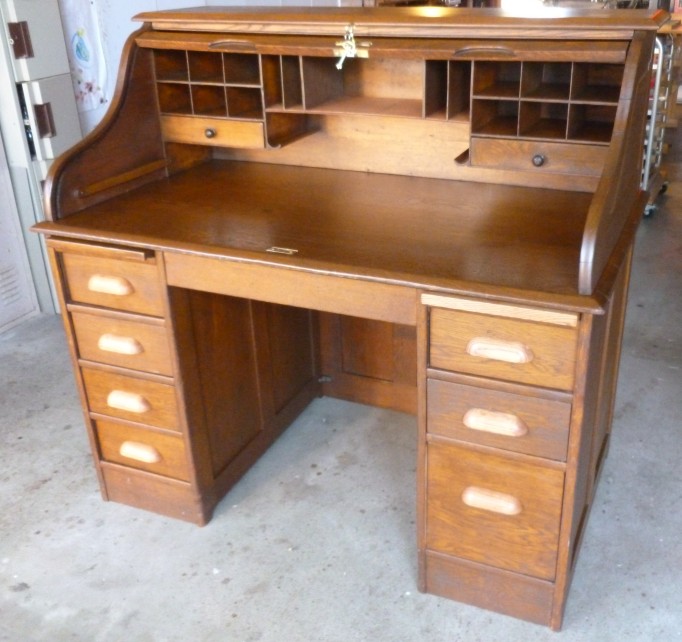
This 100 year old plus roll top desk – no manufacturer’s marks so its lineage is unknown – in oak (except for the drawer parts that do not, in the main, get much visibility) was not in dire condition. Mainly, it needed some physical rehabilitation, a few new parts to replace the defunct, and a general cleaning. The client did not want the surface finish restored to factory perfect. Even so, the job took me more than twice as long as I estimated. You win a few, you lose a few.
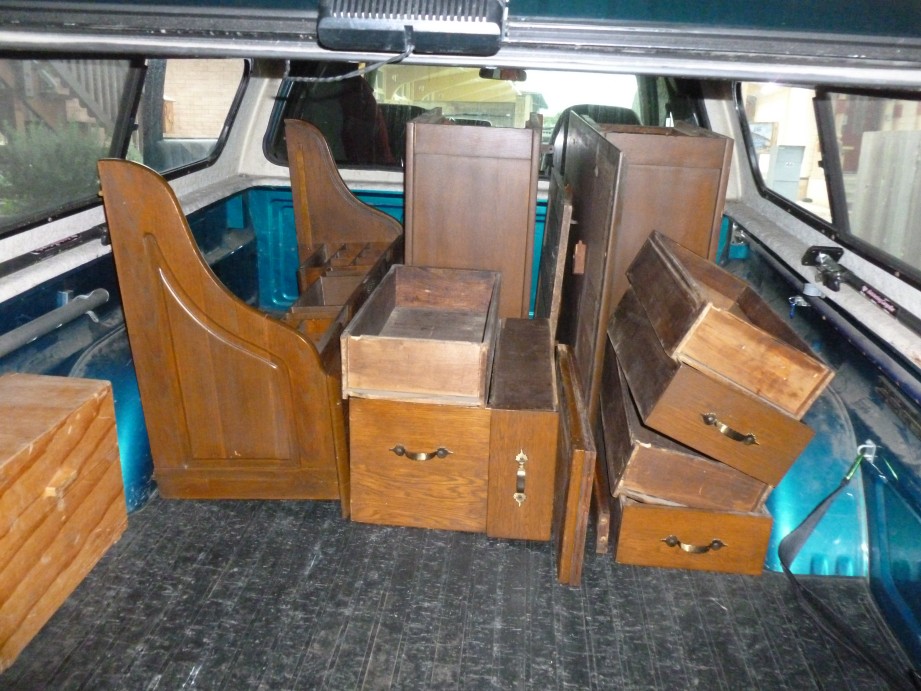
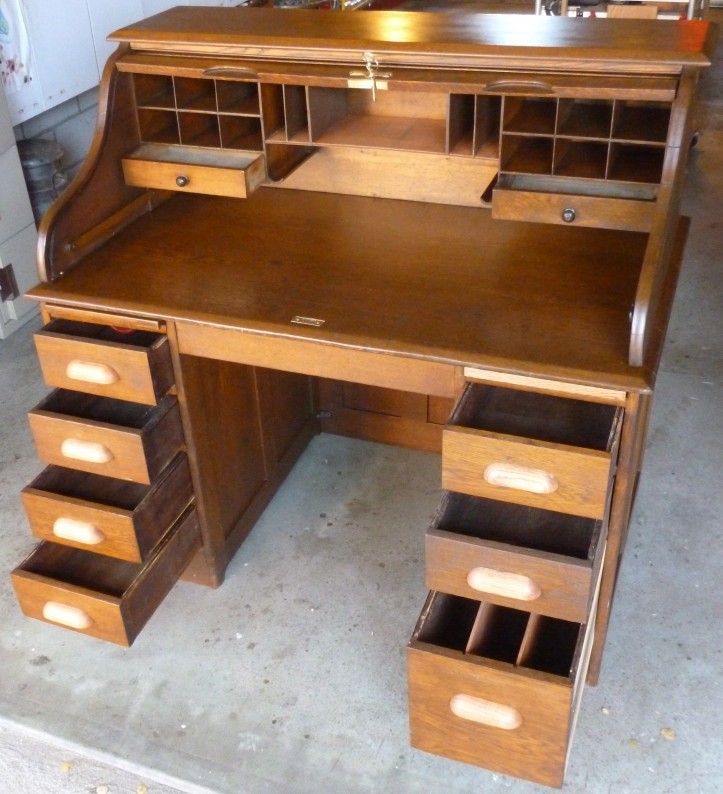
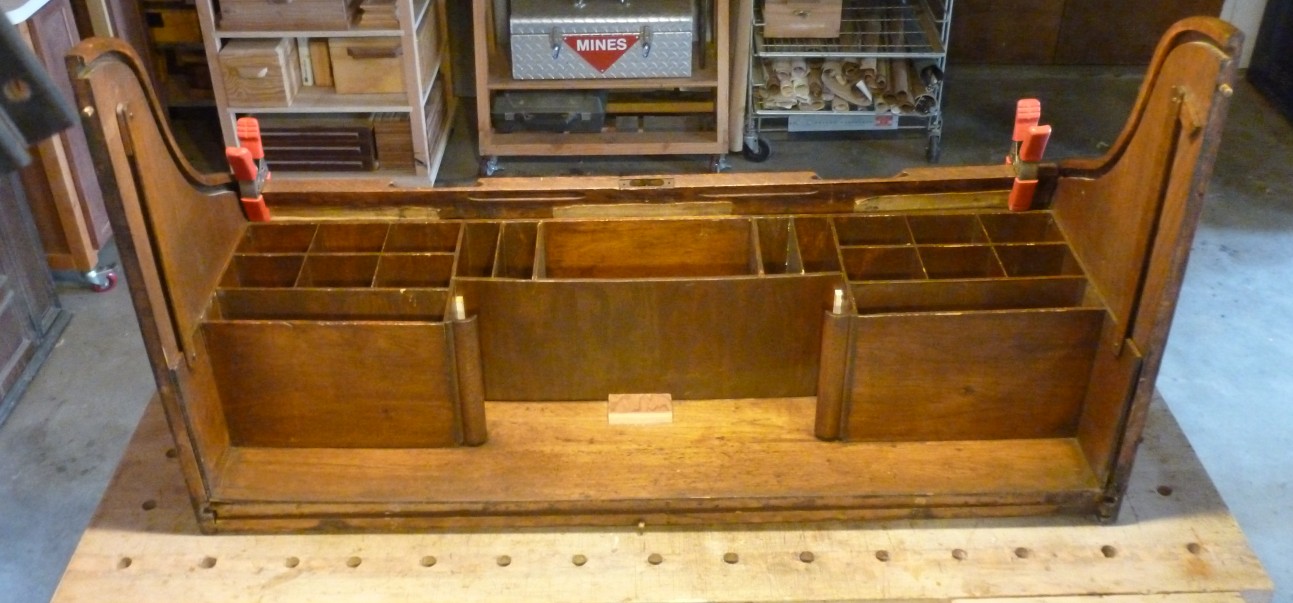
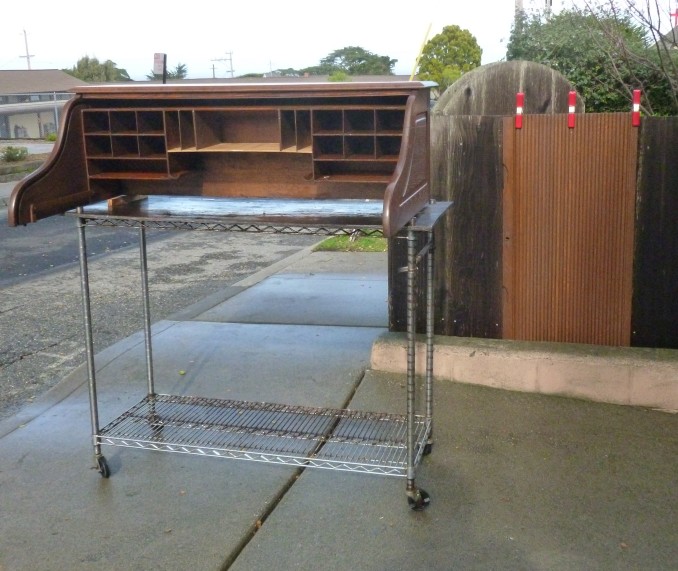
In pieces and sorely in need of artisanal TLC…
Here is how it arrived at my shop.
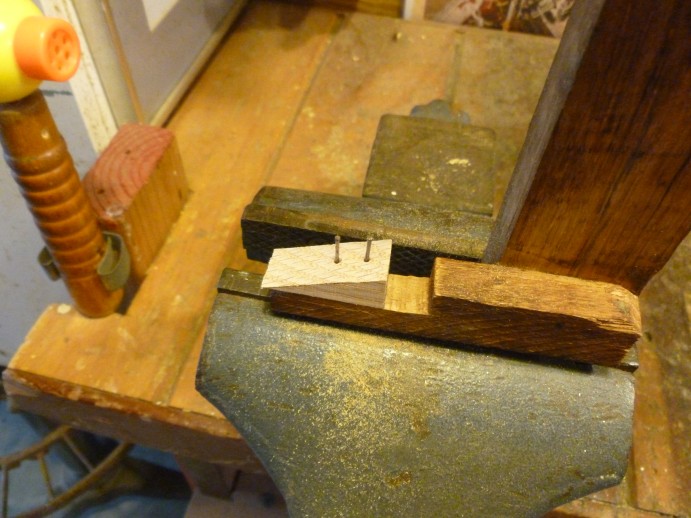
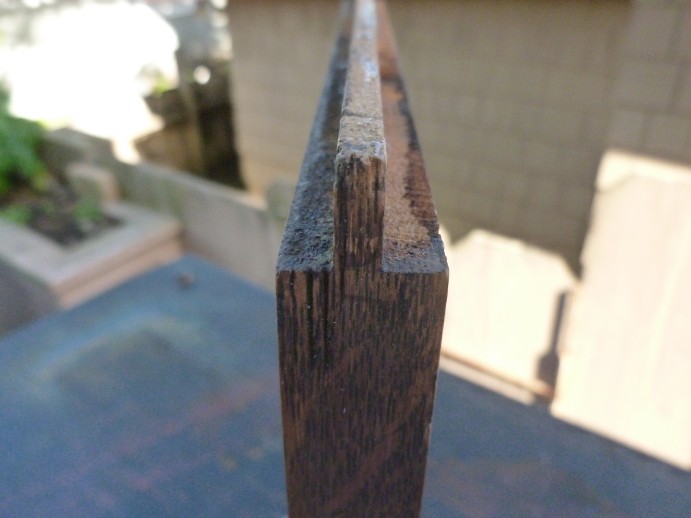
Here is the triangular shaped replacement ‘knuckle’ on one of the locking assemblies.
At first look, it was apparent that one of the locking knuckles needed fixed. This was done in rough to be finessed to final shape once the glue was dry.
The locking ‘knuckles’ are mounted on an oak slat that is moved down by gravity and the locking knuckle slips over the back edge of the drawers. When the roll top is opened, the tambour door presses down on two dowels which actuate a cam and that cam lifts the locking assembly and this releases the drawers. Top notch 19th Century engineering.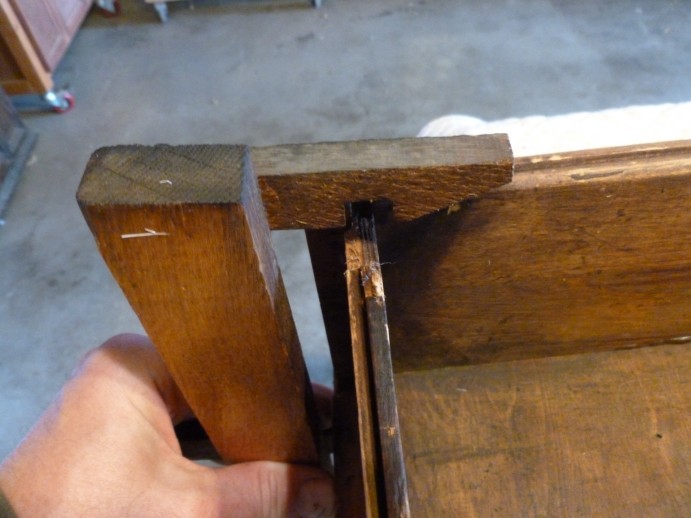
This is a view of one of the two locking assemblies showing how, when the roll top is open and the cam lifts the assembly the drawer is released. You can see in this view how the drawer backs have been worn over time.
Next, the sagging central horizontal surface needed help. The client’s father had imposed some ungainly blocks to shore up the thing. These were removed; we can do better.
The central, horizontal shelf before repairs (and eventually, replacement)
Removal of this central saggy was not easy. A repair had been botched: hot melt glue. While hot melt is a great product for some applications, this was not one of them.
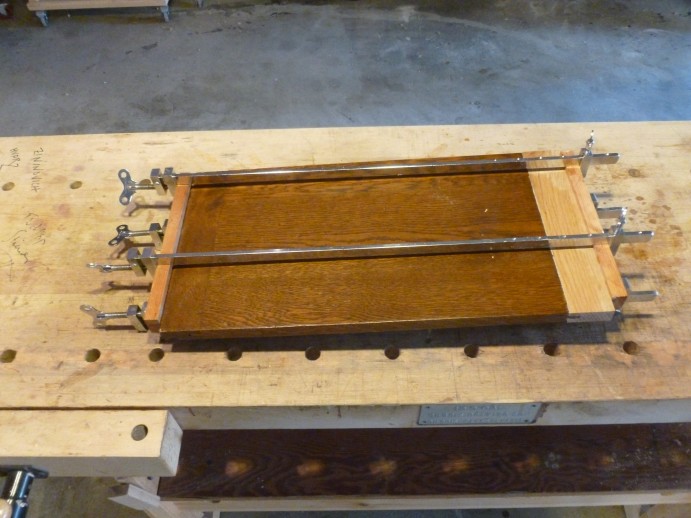
Once removed, I decided to glue in a brace under the shelf which would correct any age-sag and make the shelf more robust. Here it is in glue up.

I’m gluing in an oak brace underneath that will prevent sag …. unless the client uses the shelf to store his anvil collection.
And finally, for Day 1, directed attentions to the left side bivvies, which were reluctant to form a coherent unit, and in fact, the bottom of these side bivvies was proud of its kerf, and this Student Body Right has contributed to that unhappy sag of the horizontal center piece.
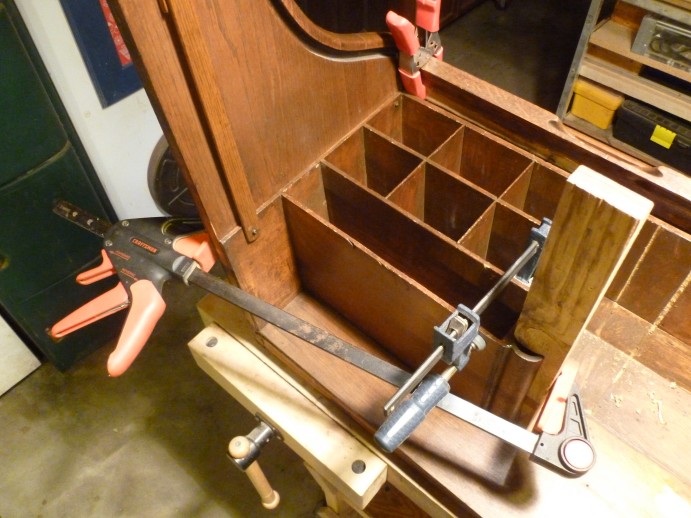
I’m gluing the left side bivvies to the bivvie framework.
Here is the glue-up.
Day 2 –
The side bivvie glue up was a success.
Too much of a success.
By securing lashing the side bivvies to the left side of the desk, I actually widened the distance to be spanned by the central, horizontal shelf.
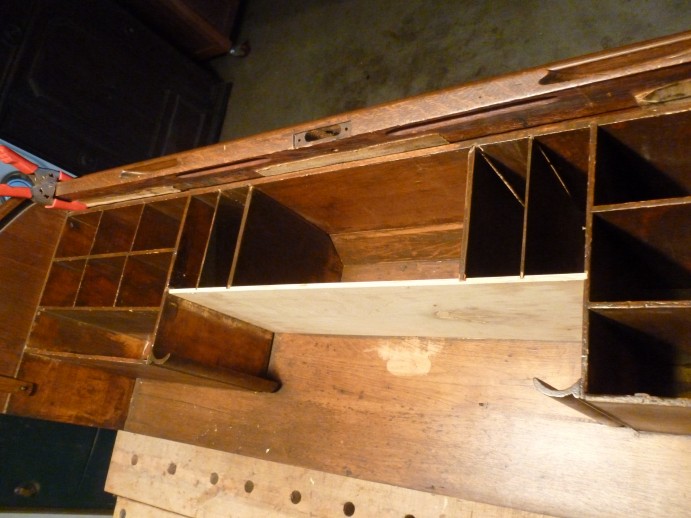
Alas, Alack …. after unclamping the floor of the desk center bivvy, it was discovered that overnight, the Shop Gremlins had shrunk the floor lengthwise by 3/16″ and is now too short to register into the kerfs which, in a perfect world, would support same.

The center, horizontal shelf is no longer long enough to span the kerfs on either side. Nerts.
What to do?
There were two options:
1. install supports to support the now insufficiently long floor,
2. Form a new, longer floor.
Since we’d just removed the ugly plywood supports, I opted for a new floor from some 1/4″ ply I had on hand.
I thought about forming four new verticals, but decided that this was overly heroic.
Installed the new floor and glued in the two 1/4″ verts.
Here is the center assembly in dry-fit.
The new central horizontal shelf – since this was new ply and I was counting on the strength of Gorilla Glue between it and the verticals, I did not brace the underside.
Now, let’s finalize that locking assembly – specifically sand down the replacement ‘knuckle’ AND put nails into all the locking arms so as to trust less the 100 year old hide glue, or whatever it was/is.
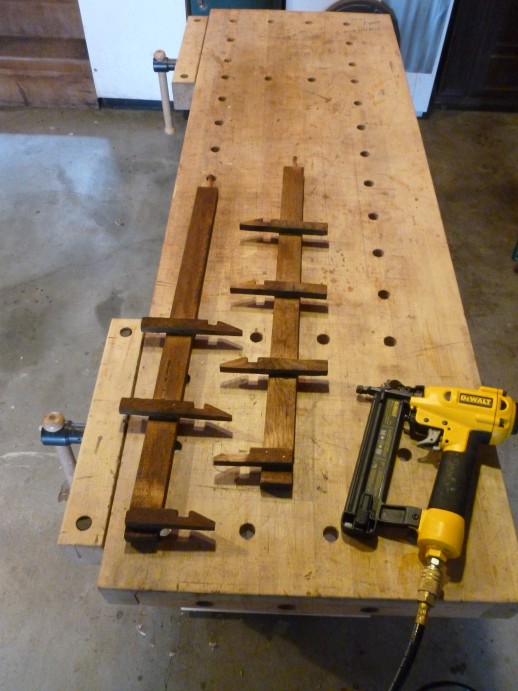
Here are the left and right locking assemblies getting some additional physical robustness.
Next: That gappy coming apart right side base unit.
Once it was cleaned up a bit (I was waiting for a sunny day to wash all the parts) and all (most) of the spider nests were removed, the glue up was straight forward.
Tongue and groove construction glues up rock solid.
Less straight forward: color matching.
I wasn’t tasked to restore the finish, but I certainly needed and wanted to get the new parts as close as possible to the current, aged patina. And, as it turned out, wash over all the show surfaces with whatever stain was the best match so as to impose a more uniform tone to the entire piece.
I have a set of stain swatches dosed with every stain I possess, but they are pine.
Und Zo, tested out some colors on a spare hunk of oak.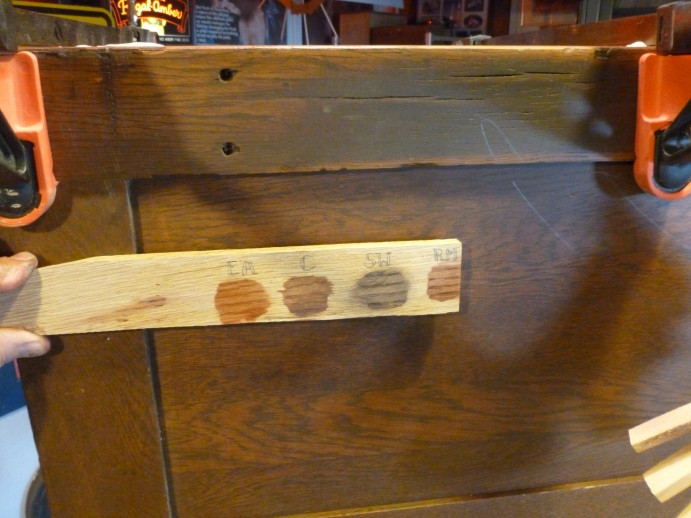
Red Mahogany
Special Walnut
Cherry
Early American
Results: I thought that the EA best approaches the exterior tone of the desk finish, what do you think?
In any case, there’s no rush to a Judgment At Nuremberg since I wanted to wash all the parts and have finished all the mechanical repairs before I put any stain to the desk parts deserving same.
The drawer pull handles are a slam dunk, but the choice of stain will be most obvious on them….
Day 3 –
As this promised to be sunny here on the Peninsula, donned my high school cheerleader uniform and washed all the parts – in and out – with Murphy’s Oil Soap. They now look 14.3% better and feel 21.8% better to the hand.
Wash day here at JohnsonArts.
In the process, discovered a loose brace in the Left Base Unit which was quickly glued and screwed.
As a test, put lemon oil polish to one side (there on the right) of that base unit. I think it the way to go as a final finish.
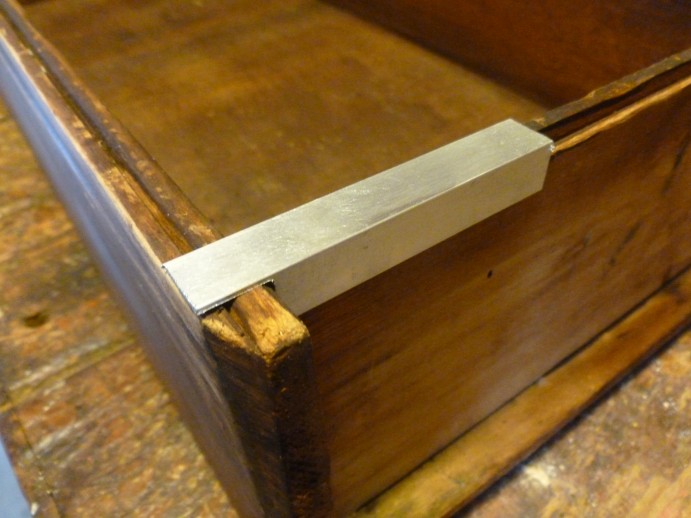
I have a concept to remediate those worn drawer backs where they meet the locking knuckles:
It is an 8 cm long piece of aluminum angle with 1.2 cm of one end of the angle excised.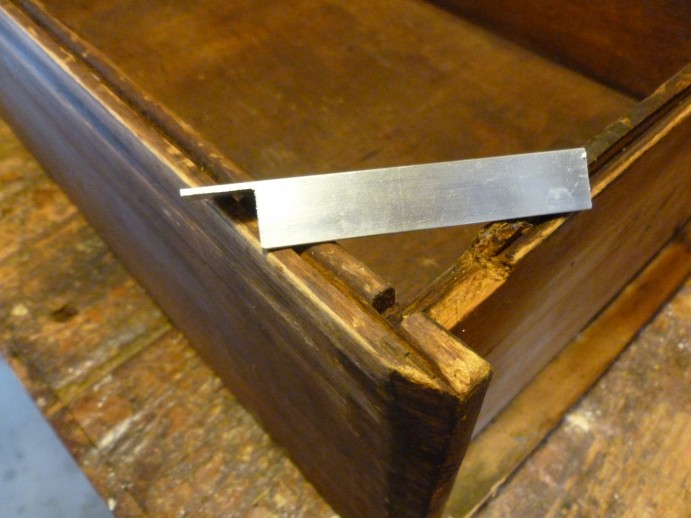
This cut out is so that it fits over the top edge of both the drawer back and side.
It will fit into the locking knuckle and will improve the coherency of the locking mechanism.
It will, in practice, be drilled for nails to fasten it to the drawer side and back.
It will be cost effective: I had sufficient length of the aluminum angle on hand.
The seven, new drawer pulls and the mortise lock were ordered from House of Antique Hardware: $52.61
Day 4 –
Wildman and I voyaged to the distant realm of Watsonville for to attend the Jackel Temple of Lumber.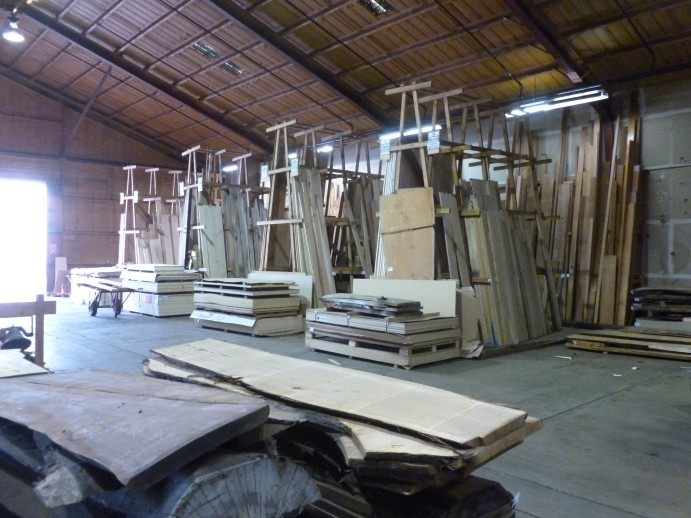 I needed a couple of board feet of white oak. This to replace a tatty plywood pull-out shelf, and replace a missing end cap on the pull out shelf for the other side.
Happily, Jackel had 7/8” thick oak, which was a time savings as typically hardwood comes in inch increments. Had it been what’s called 4/4 in the parlance (1” thick), I would have had to plane down the oak.
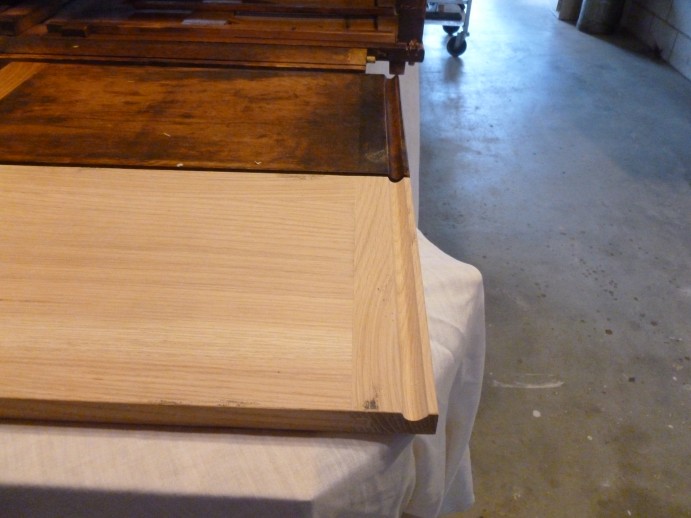
Once back to The Shop, I roughed out all six parts; five going into the new shelf.
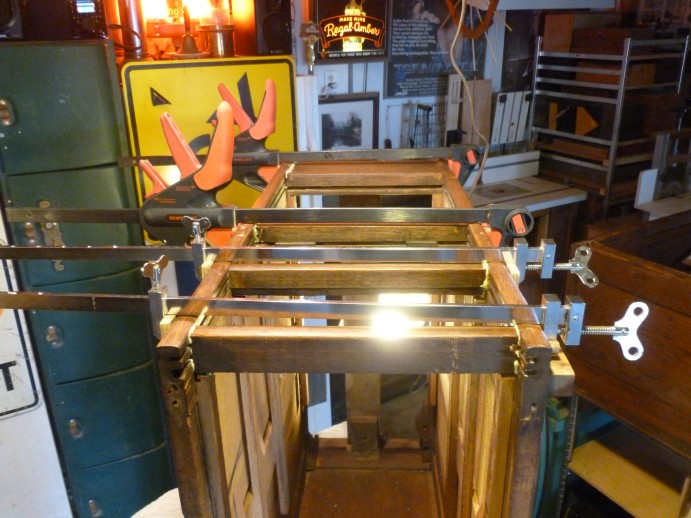
Large slabs are made from gluing up smaller slabs.
Probably simple butt joints (likely a contraction of abut joint – two flat surfaces glued together) would be sufficient, but I went the extra 9 yards and cut for biscuits.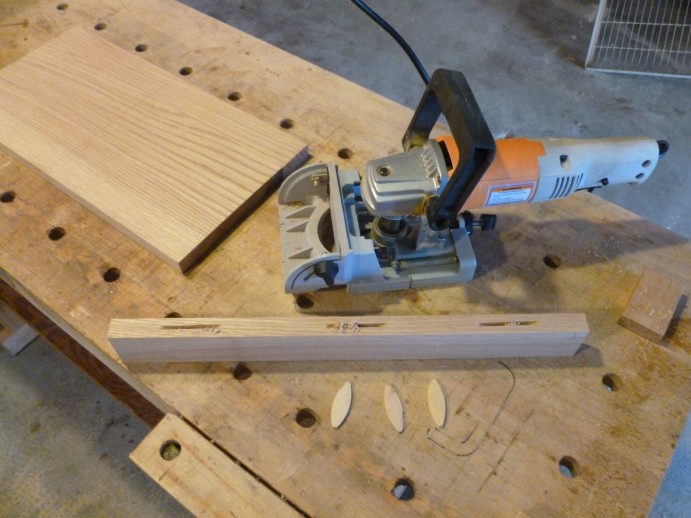
Biscuits are small wafers that seat into concave slots created by the biscuit cutter. Their purpose is to span the butt joint to provide more glue surface and an improved mechanical stability across the joint.
In Ye Olden Days (and today too, as we shall see), gluing up slabs was a dodgy business; bar or pipe clamps will cause the slabs to bow. But not here, not today because I have the Windriver clamps.
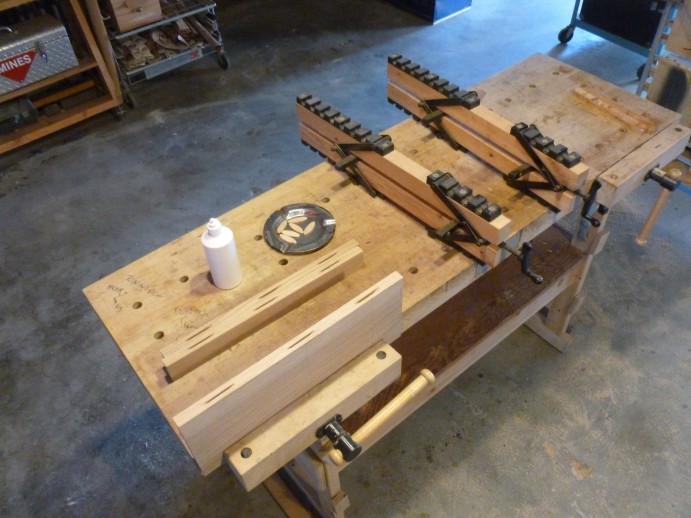
Whoever invented these clamps deserves a Nobel Prize.
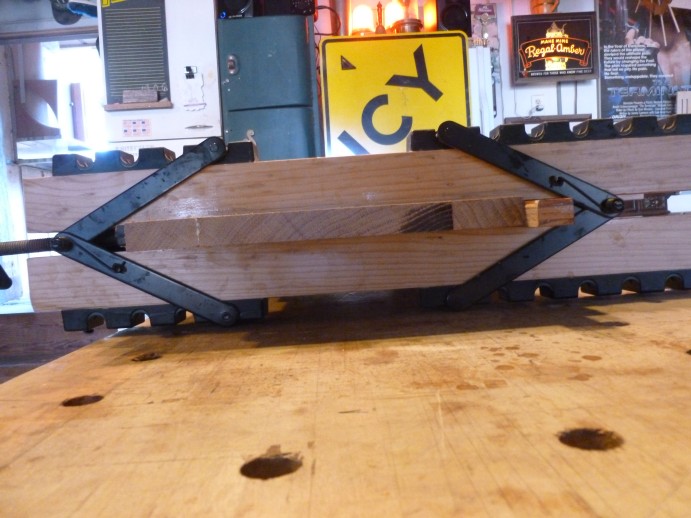 From this end-on view, you can see the magic: the clamps exert force both compressing the butt joints and inward both from the top and bottom: No Bowing.
Whilst this is maturing, I turned to the end cap on the extant pull-out shelf.
1.2 mm off-center, short toward the left…..
And discovered that the tongue was not centered on the shelf.
Nuts.
This complicates the formation of a matching groove in the end cap.
Ordinarily, your artisan would oversize the end cap thickness, center the groove and after glue-up, would simply sand down the proud surface. But as in this case this would abrade the existing finish, to some extent, I didn’t want to do this.
And so I snuck up on the groove in the end cap, and when it was close enough, put the glue to.
 Here you see an example of olde timey clamping methods: your artisan staggers the clamps top and bottom so as to better balance forces across the glue up and minimize bowing.
Day 5 –
The news is all semi-good. Unclamped the new shelf, sanded it true (mostly), and then cut the tongue(s).
Likewise formed the grooves on the two end caps and manfully glued it all together.
I did not embark on drawer repair, but keen to test the Early American (EA) stain, tried on the new end cap for the extant drawer.
It isn’t perfect, of course, but it’s not too bad.
Even less not too bad was the EA on the new ply, Desk Centre.
Even better: a light wash of the EA over the dints and dents, scribs and scrabs on the desk surface and edges almost entirely effaces same.
Here is a before look at the top inside edge of the desk superstructure.
Here is an after.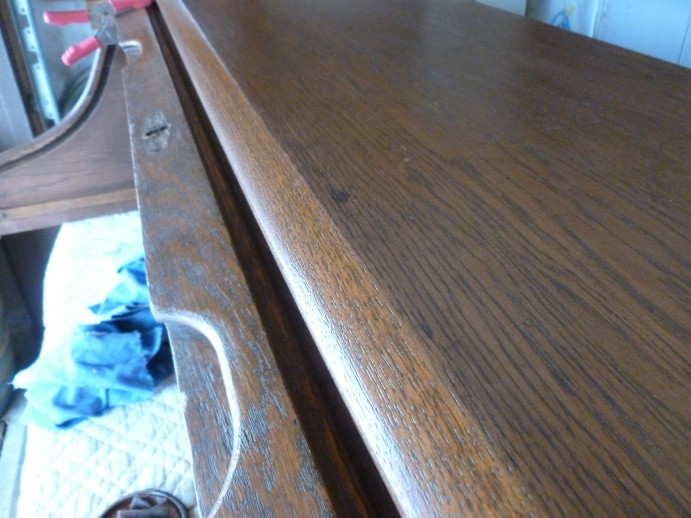
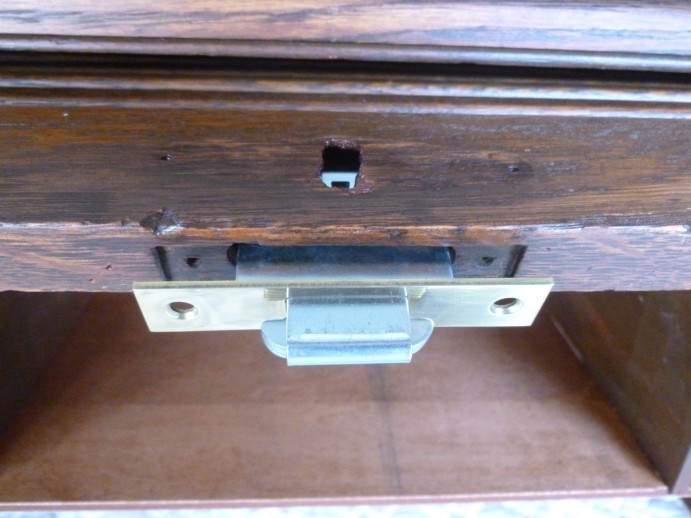
Just then, UPS arrives with the drawer handles and the mortise lock.
The threaded inserts in the drawer pulls are not in accord with the existing holes in the drawers, but I knew that going in. Not a problem.
The mortise lock is a close fit, its selvage (me neither: selvage is the face plate of the lock) a bit longer than the existing mortise; but a bit of artisanal legerdemain and it will fit fine.
The real challenge is going to be fitting the corresponding lock plate in the desktop.
Since I had the stain out, I put it to those seven pull punks. All good, clean (mostly) fun.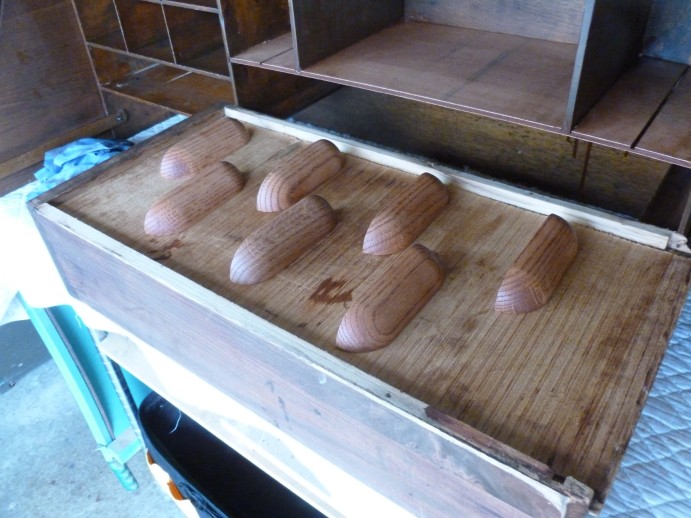
Day 6 –
Drilled holes for the new drawer pulls, and then formed the aluminum braces to remediate drawer back wear due to the locking mechanism.
Fitted the four drawers with same for the left side.
When attempting to do the same for the right, discovered a busted side panel on the large drawer, which needed gluing and postponed fitting.
 Unclamped the new pull out shelf and routed out the finger grip.
Seconds in the reading – hours in the doing.
Day 7 –
This day, I fitted the right side drawers with lock remediation.
Fitting required some creative sanding to get the drawers, particularly the large, lower punk to slide easily. To ease this annoyance, I applied wax where warranted.
 And now, the Rubicon: the new mortise lock. The locking part was easy; just enlarge the mortise a bit and it’s in.
The corresponding face into which the lock engages was the challenge.
The original mortise was cockeyed which I did not attempt to remediate.
Rather, ‘improved’ it to fit the new lock face.
Results were satisfactory – Hephaestus Be Praised!
Day 8 –
End Game: washed over all the show surfaces with lemon oil polish.
The Results:
One Response to “Roll Top Desk Restoration”