Post No Ills
 Change in the weather. Shouldn’t have had to look at the satellite plot. The low-lying gloom lifts, we can see the clouds, the pelicans alight to the water. Can’t smell the rain, but it is out there. We can hope.
The next morning: Rain, honest, earnest, drenching rain, although intermittent, made for a delicious morning micro-rike, blowing into my face march west. Home soaked in the first winter’s touch. Need more suitable rough weather workout clothing… Send burlap.
SHOPDAY –

Parts for Test Box #5
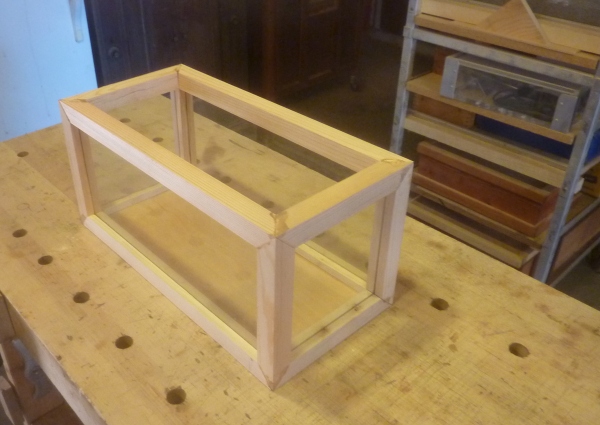
First in many a half-moon, so demoralized have I been about the successive double-45 trial balloon failures. But nothing for it. Keep trying. There’s the skeleton on Text Box #5 patiently waiting.
And this being All Hallow’s Eve, the parish school under my view holds for its initiates Costume Day. Costumes rigorously vetted so as not to offend, so there’s no Indians, no colonists, no atheists being torched at the stake, no black face pantomimes or Supreme Court justices in drag.  Did like the astronaut and Iron Man go; but why isn’t it gender stereotyping (or worse) dressing up a 4 year old in a bride’s gown?
Unclamp/shoe the box top to find that the joints are good, mostly. Only one questionable. Cut the glass for the box sides, dry fit is Good, mostly.
This time, I’m not shoeing the box top in glue up, can’t be worse that the failures of boxes 0 through 4, can it?
Our long suit here is perseverance.
Glue up ex post facto shows gaps. Bad. BUT, the gaps are less Lauren Hutton, in sum, than the two gaps of Test Box #4. Maybe I’m gaining on it. I shrug.
Phone interview with Naravoona or some such with Tata Consult

This is the original Dennis Copeland sketch on what the donation pedestal ought be like.
ing. TCS is looking for a Product Manager. The Client? CTB. At this point, I’d consider applying for fireman apprentice in Hades.
Do some forward planning for the Colton Hall Donation Box,
specifically, a detailed time and cost estimate. Clair of The City is likely to deliver here tomorrow the clear, acrylic box which will form the repository of Colton Hall guest beneficence. Then it is wait for approval – if approval there be – of my $711 estimate: $86 in materials and 12.5 hours of labor.
LABORDAY –
Not really, that occurs Monday next as I get a call from Dave Lando of SPAR – can I be trained for an in-home assembly service on 11/4? Maybe. There are two jobs, one in Boulder Creek, the other in Santa Cruz. A bit off my patch, but with no prompting, Dave ponies up $30 to cover gas. Wadda guy.
So of course I agree. This will complete my training, in so far as SPAR will be concerned and, once I clear the background check, I’ll be authorized to assemble file cabinets at Spanish Bay for $5.
And another job (maybe) arrives at 10. It’s Clair delivering the clear, acrylic box which will form the cash receptor, once I, or somebody, builds a pedestal for it.
I give Clair a hard copy estimate of the job (fun!) on which she and Dennis Copeland, the City Historian, need accept, dicker, or deny.
Until such time as I get the high or low sign, I do nothing …. Nothing physical that is. I’ve mentally walked through the entire fabrication and assembly process, mostly. There are still a few known unknowns concerning the top trim that will also fasten the acrylic box to the pedestal, and the drawer and door installation. But I’ve got 91.3% of the effort mapped out.
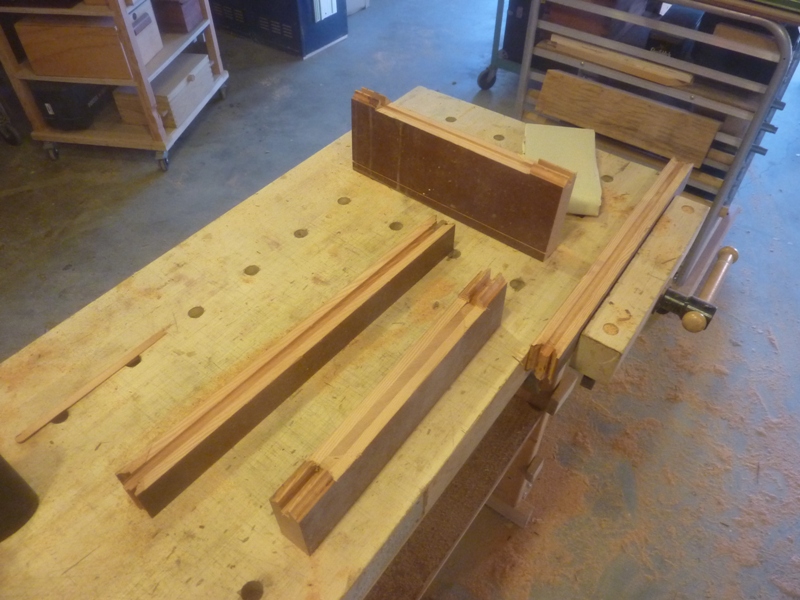
Back to Test Box #5 – Might as well form a lid for the thing, so it won’t be a total wash. Scarved some alder off Surplus Pile #27, cut to match the width of the box top, the kerfed it for glass, then formed the 45’s. This go I’ll sparingly use Monkey Glue on the glass as the lid needs the extra security of the glass-to-kerf bond as the 45 joints are slim in glue meet area.
HEY! Here’s The Prof – he’s Alive! Been sick most of the week, must have been well enough to make the Cavalry Meeting at The Lab, but isn’t well enough, or too legless to pop into The Shop for a quick one and he’s off.
ONDAY –
As in the Prof.
I’d just finished the third rike of the week – all (most) internal systems operating nominally – jaunted farther than I had intended, both in time, distance and vertical elevation, when up the street silently lurks a gray Prius, to auto styling is like a Birkenstock to Blahnik, and it is The Prof, do I want to voyage to Cost Blow?
Even though Grocery Cheaplet beats Costco on grocery prices, there are commodities – kalamata olives, feta in quantity, pecorino and romano I favor – that I can find no where else.
Sure.
For a midday Saturday, it’s not too thronged, must have been early. We only have to park a caber toss away and need deploy only three stink bombs getting to the back of the place to the foodstuffs, where my shopables are collected. The Prof fills a cart with Lagavulin and some paper towels. My tab comes to $120, I can’t believe it, but math is math, at least in base 10.
He dumps me off at The Slackucenter where I unclamp Test Box Lid #5. It is not the precision I desire, two of the corners are off a hair and a half, but it will have to do.
Do for What?
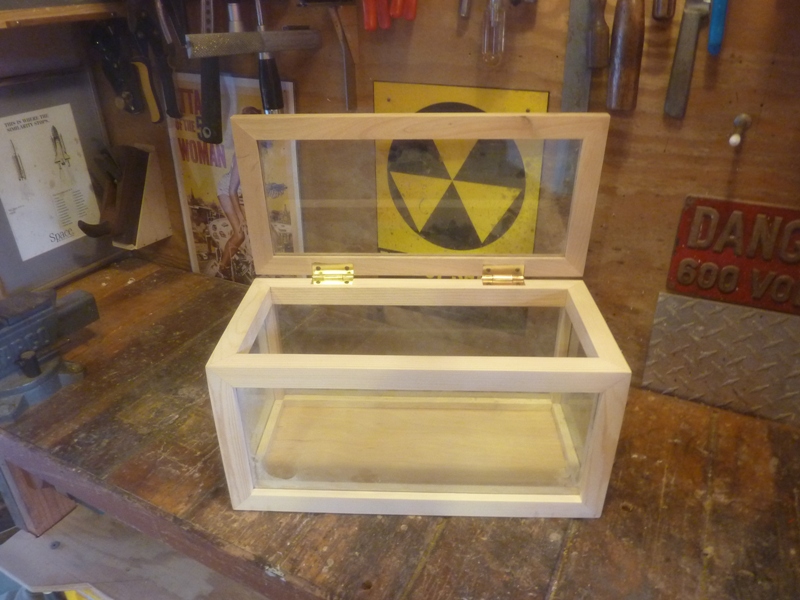
Test Box #5 with hinged lid, will probably donate it to the School For The Blind as an archery target.
Still haven’t solved the tri-joint glue up insufficiency. It occurs to me that in Test Box #1, I glued up the entire shebang in one go, no shoes, no gluing up the top and bottom then the next day gluing in the verts. Maybe – no, not maybe – that’s the tactic I’ll employ on Test Box # 6, if I make it that far.
Next –it is mortise out for the two hinges (I need the practice) which comes out almost okay, except for the lid overhanging the box top by a divergence from 2 to 4 mm on the front when the back is flush. I obviously have a relatively high tolerance for pain as I screw in the hinges and let the odiferous mass lie.
Just then there’s a hoot from the game preserve, it’s The Prof with a half case of medicinal Irish tonic which is lofted to the north promenade and taken in meaningful doses.
You get lucky sometimes.
WORKDAY –
Just getting to the in-home assembly jobs was work.
Job One – 3 miles northwest of Boulder Creek, which puts it just about 7.3 miles off the exact center of Santa Cruz Mountain No Where. Renate, who lives in a condo on the precincts of the Boulder Creek Golf Club needs a two-drawer file cabinet assembled.
The blue sky encourages the truck to drive north on 1, no traffic issues except for the road sweeper on 17, a job that cannot, simply cannot be done at midnight, then off at Mount Hermon Road and so to Felton, thence north up the San Lorenzo River valley to Boulder Creek and 236 into the void.
I find the address and find myself earlier than Dave Lando, my District Manager and expert tutor, and so have time to enjoy the sweeping, cool wind leaning hard on Autumn.

As I wait for my mentor, Dave Lando who will introduce me to the intricacies of pre-fab file cabinet assembly, I have time to watch the duffers for whom this little slice of mountain crevice is the culmination of dream.
Dave had actually been to this slice of pine tree paradise before, had a high school buddy whose parents owned a plot. Strange.
The file cabinet is simple to toss together, once the neophyte becomes perfectly acquainted with the parts, where the parts go and the assembly sequence. It’s not difficult, but it is exacting. It takes about 45 minutes for me to do, it would likely take Dave 15 minutes. But I’m gaining on it.

The assembled file cabinet in the position of honor, for we assume that Renate’s husband has passed on to another form of existence.
Our next client is in east Santa Cruz, 50 yards off the surf in a surf shack any self-respecting chicken would refuse to enter. Probably worth north of a mil.
Inside is a slim but heavy box the size of a pool table top – it’s the desk and next it, a smaller box, about half the size containing the proto-parts of a two-drawer file cabinet which want our attentions.
We give it.
The desk was a complicated piece of work. Too complicated for me to photograph. Again, not difficult to assemble (but difficult to look at once assembled – it sports a faux marble top with Craftsman details on the drawers and legs – but rife with assembly parts new to me.
Dave said he’d put it at a Level 6 Difficulty for him, which made it about a Level 367 for me. But he was patient, let me work through the instructions, and provided occasional course corrections when I’d tried to put the square peg into the triangular hole – his typical interjection when I was about to load the TNT and the primer into the same hole with a hammer and spike was “Let me share this with you….” – allowed me to get the feel and rhythm of the process. The only thing not completely enjoyable about learning and building was working on my knees. Oi.
It took about an hour and a half, it should take 40 minutes. But now that the desk is up, we can lay the flat box of the file cabinet on top to protect the surface and build the file cabinet in a more comfortable position, self-respecting chickens excepted.
The file cabinet was a variation on the theme of Renate’s, larger, with some interesting assembly wrinkles including a sort of locking T-joint for the drawer sides and sliding dovetail joints. It’s a nice piece of work for veneered particle board, and like all the other furniture I’ve learned about, embodies a million dollars worth of engineering expertise to make it simple enough to put together by a yay-hoo out in the provinces. Once the yah-hoo, I mean Independent Merchandiser climbs the learning curve.
Once done and client approved, we get the sign off and the client hands me a tenner as a tip – completely unexpected and Dave refused to split it with me. What a dick.
I was nackered. It was 4:30, and Dave takes a rain check on some beers.
Home just as twilight turns purple black.
Another honest crumb earned. If only it wasn’t for that gripping sensation in my throat ….
SICKDAZE –
Friday, it’s Friday … really?
That grip in the throat four days ago put me in the grasp of the first respiratory infection in years. Full on flaming throat, nausea, chills, heat spasms, lassitude (more than usual). Will the noxious bacilli (or virii) take up residence in the skull or the thorax? When will sleep be possible?
I do not recommend this as a weight loss technique, but not eating for three days does have a slimming effect.
Amid this taste of death, life must go on, and so do I, the day after our local off-year elections, elect to case the precinct for corrugated plastic – you know the kind, the Brenda Limost for Water Board.
The harvest was rich: 3 7’ x 4’ers and 3 4’ x 3’er’s. And there was more – collected from Char another sack of spent wort from their home brew, and in turn left them a loaf of day old JohnsonArts bread.
Probably it was the next day, or some day that I went to Colton Hall to discuss some Donation Pedestal details as Dennis the Historian has agreed to my bid (obviously too low): cosmetic details, such as rounding the hole in the clear acrylic box floor, feet for the pedestal which will make it look less like an upended crate, and on which side do the door hinges go.
Invoice being cut, good thing I’d already built the drawer so I could say that I am not waiting for the payment (in NOT full, W-2 alas).
Friday. Really?
Feel well enough to case the lumber yard to see if I had on hand sufficient ply for the job to hand. I did, and there is sufficient already creatively deconstructed fir doors for the feet and topside trim.
If I’m well enough to scan the lumber, am I not well enough to cut some?
Yes, maybe. Nothing for it but to doff my soiled jammies and try.

There is on the mortise lock a stamped, not forged name “Corbin” which makes me think the hardware post WWI, which makes the door less than 90 years old. But then again, we do not know if the mortise lock is original…
Today’s Thrust: rend the 90 (well, given the mixed steel and brass nature of the mortise lock and hinge, maybe 80 year old) year old fir door into five parts – four verticals and a door. The door formed from the inset where the mortise lock holes prevented this portion being used as a pedestal side.

Looks like a corpse about to be dissected, and in a way, it was. No disrespect intended.
Step 1 – determine the height of the 4 verts figuring in the height of the feet and the top trim, top trim into which will nestle the acrylic box. Spec mandates a 31” high pedestal, which is about 76 cm, factoring in the feet and trim, makes the verts 71 cm.
Cut the entire height of the door, on the hinge side
to 71 cm
Step 2 – Cut halfway through both long sides back ¾” from the edge. When the verts are all cut out, I’ll final size them to width on the table saw, and then make the second cut to free this rabbet into which will fit the ply pedestal floor and the top.
So much for the easy part.
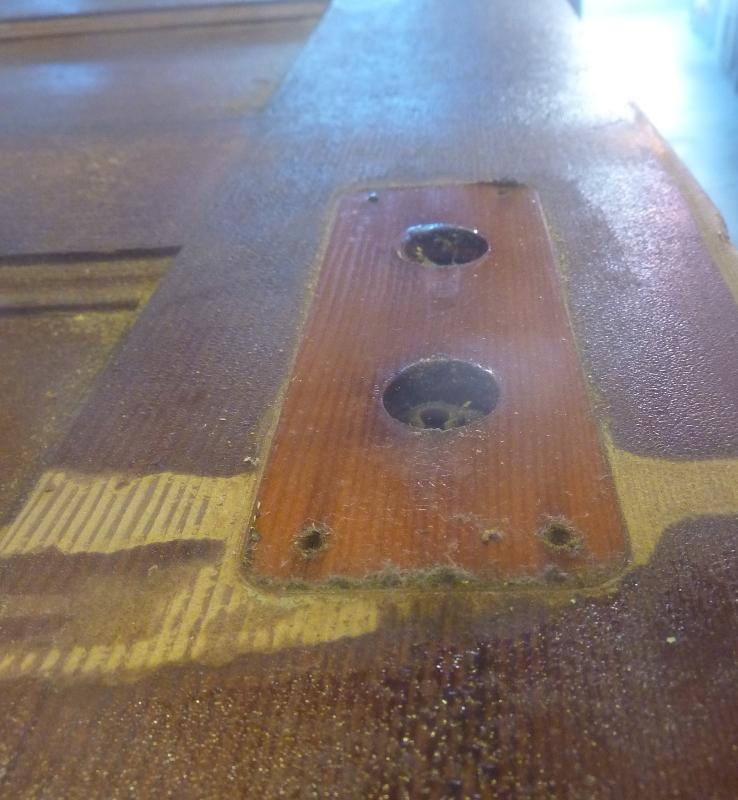
Under the faceplate of the lockset is the original color of the door.
Step 3 – Now it’s cut four sections centered on each panel insert to 36 cm (Spec says a 14” square pedestal). I do not know how I would have done it without the Festool plunge saw and guide rail. Don’t have to know. Probably cannot be known.
Cut three out, then reach the panel adjacent to the lockset hardware from which I cut what I intend to be the door.
Step 4 – Cut oversize outside the panel that which I intend to be the door. Unfortunately, the ‘trim’ which ought to be part of the hoped for door is actually part of the real door and so overcutting is mandated otherwise the ‘trim’ would come off. It did anyway. Sigh. On to Plan 34, whatever that might be….
Step 5 – Plunge cut just on the panel insert to form the ‘jamb’ for the door. Cut almost to the corners which I’ll hand saw free next.
All of this was complicated by a lack of uniformity of the door. The panel inserts varied from between 25 and 26.5 cm which meant that I had to measure each one from the center of the panel and square to the fresh cut. Not my idea of precision or efficiency.
But then again, I am not my idea of precision or efficiency.
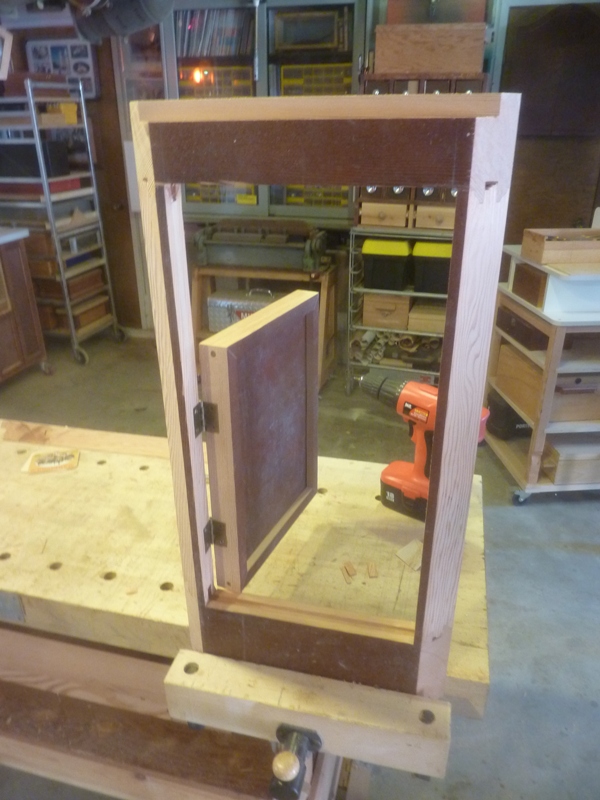
This is the vert in which will be installed a door and drawer front – the center panel extracted, the parts laid bare.
Only one more task before a flop into a heap: take apart the 4th vert serving as the door side so as to glue it up. I know, it reads strangely, but the door insert panels are not well or much glued together, and the rail and stile construction isn’t either, so the thing comes apart in my hands. This has implications for the entire pedestal itself since the other 3 verts aren’t a solid mass, may have to pull them apart and glue them back together as well. This awaits Midnight Study Hall consideration.
Meanwhile, clean up the inside cuts on vert #4. Since the original door panels were floated, there were gaps where I need no gaps for eventual hinge installation, so these had to be filled in with slats. These planed and glued. In spite of wanting, needing to glue up vert #4, I did not as I reasoned that forming the hinge mortisii would be ever so much more easy before glue up than after.
Just as I’m flopping down up drives The Prof, can he borrow my brad driver so that he can build a door for his sauna so that in the depths of the winter to come, I may heat soak? But of course. We hoist a pint and away he goes.
I still breathe, I cough less, spit less and my eyes feel less like goobers pulled out of Bunker 19 on Hole 2 at Spanish Bay.
ACHIEVEMENTDAY –
Not that anyone would notice, but it felt that way.
And not just waking up without being the human mucous volcano.
No, downslack, in The Shop.
Job One To Zed – get closer to Pedestalation. First, assemble the one side of the pedestal that will house the door and drawer. Glued it up in a fit of pique when, as I was trying to remove some corner dross, knocked off a vital piece of the rail and stile joint. I cannot have shattered parts knocking about. So glue up it was. This in spite of knowing I’ll have to work inside the opening to mortise for the door hinges. Our motivations outrun our sense.

Doesn’t look like Ramming Around, but the effect is the same – I’ll have to work inside that opening to mortise for the hinges.
Whilst this pedestal side was a’gluin’ formed the trim to surround the door all the while trying manfully to use the cut off edge of the door as three sides would have the original finish, but this was chimerical as that edge was the hinge edge and was a few degrees off square. Wasted effort.
Back to the table saw to lam out square trim, cut a channel for the original door panel, then glued this up.
Now, face a known unknown. More surfaces than I’d like will be fresh cut. How to ‘match’ the 80 year old crusty, light faded patina? Harvey put it best: I dooon’tt knnoooww.
On fresh surface try Dark Walnut. Not bad, but missing the hint of sanguine claret so necessary. Try Red Mahogany. Not bad, not bad at all. Maybe the two mixed together will serve. Maybe coated with amber shellac ….. hmmmm…..
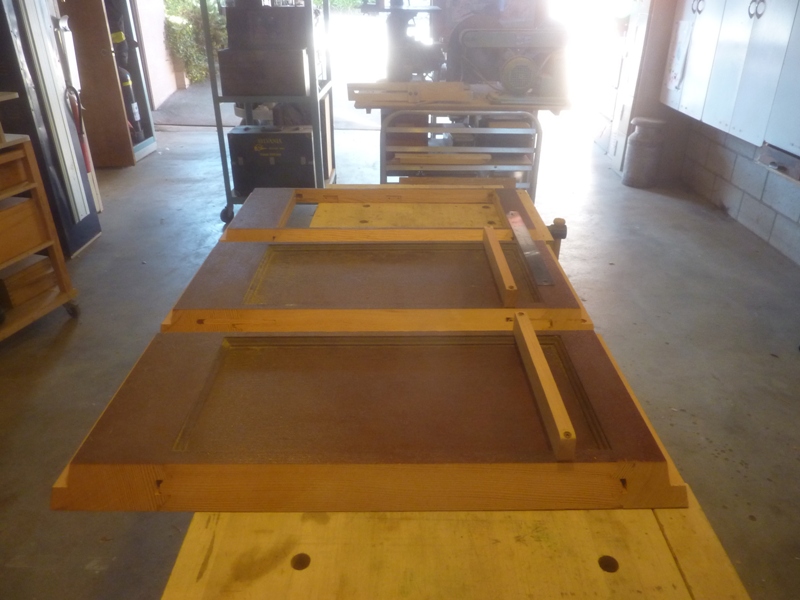
By now, the monkey glue on the open side vert had cured enough that I could unclamp same, then have my shop lackeys tote all four sides out to the water powered saw mill to uniformly size to width all, then cut the 45 degree meet angles for all.
Taxing, even with a newly sharpened table saw blade. Even with lackeys. This is the hardest fir I’ve yet seen. Dense.
Dry fit the pedestal, here’s when the sense of achievement wafted into The Shop. While the dry fit revealed aspects of the meet angle needing remediation just having the thing stand up and look like a pedestal changed the nature of the project from slaving over what looks like scrap wood into Yes, I Can See This Coming Together Now.
Still much toil (fun) ahead, although I’ve burned through 2/3’s of the time estimate. But I’m not so much working for the clock as I am to see a JohnsonArts product satisfy a (paying) customer and be of service to Colton Hall. Whatever it takes.
PDAY –
Alas, not as in Pay Day.
Other acquisitions fill in for hard cash. I won the Freecycle award of a queen down comforter and a sack of POLE syringes. Me neither. Up the hill to 1214 Lawton where the swag was waiting in the drive. Back to the Castle and down to the river where the laundry serf’s thought that they had Sunday off. Peasants.
To The Pedestal. Unclamp the door. It’s 4 mm too wide. Obviously the crew down in the Door Shop did NOT read the product specs. Loaded their coffee maker with ricin.
Fortunately, some sanding brings the door into the realm of fit, now to scarv out the hinge mortisii on the inside of the open side and test fit.
It, in reality, doesn’t look as not bad as it doesn’t really look not good. Trust me. That space over the top of the door will be filled by a drawer face. Really, trust me.
Test fit did not go well. I continue to overestimate mortise depth, and so a sequence of adding little slips of paper to raise the profile of the hinge ensues. Say Nothing.
Those are the drawer runners on the right, spanning the inset panel.
Fabbed out and installed 2 runners on which the drawer will slide – decided against pre-fab drawer slides due to the short length – I could have modified a stock set, but using a simple pair of wood slats is more in keeping with the age and intended location of the pedestal, so so be it.
Channeled out some fir for the drawer front into which will go a piece of the flat fir, then hit a wall.
The existing ply drawer just overlaps the fir trim – how to attach?
The way this sort of thing is done here is that the drawer is introduced to its slides or in this case, runners and then the drawer front is spaced evenly side to side and top to bottom in the fenestration. The drawer is then introduced to the drawer front, there being a few cut off nails that mark the position, and then the two are firmly mated. Yet this slight over lap with the gap between the trim and the fir face pose attachment conundrums.
But, the drawer is about as close to the critical path as Nova Scotia, so we’ll leave it to the Midnight Study Hall to evolve a solution.
Oh, and the POLE syringes? Still me neither. 
2 Responses to “Post No Ills”