Commissions Three
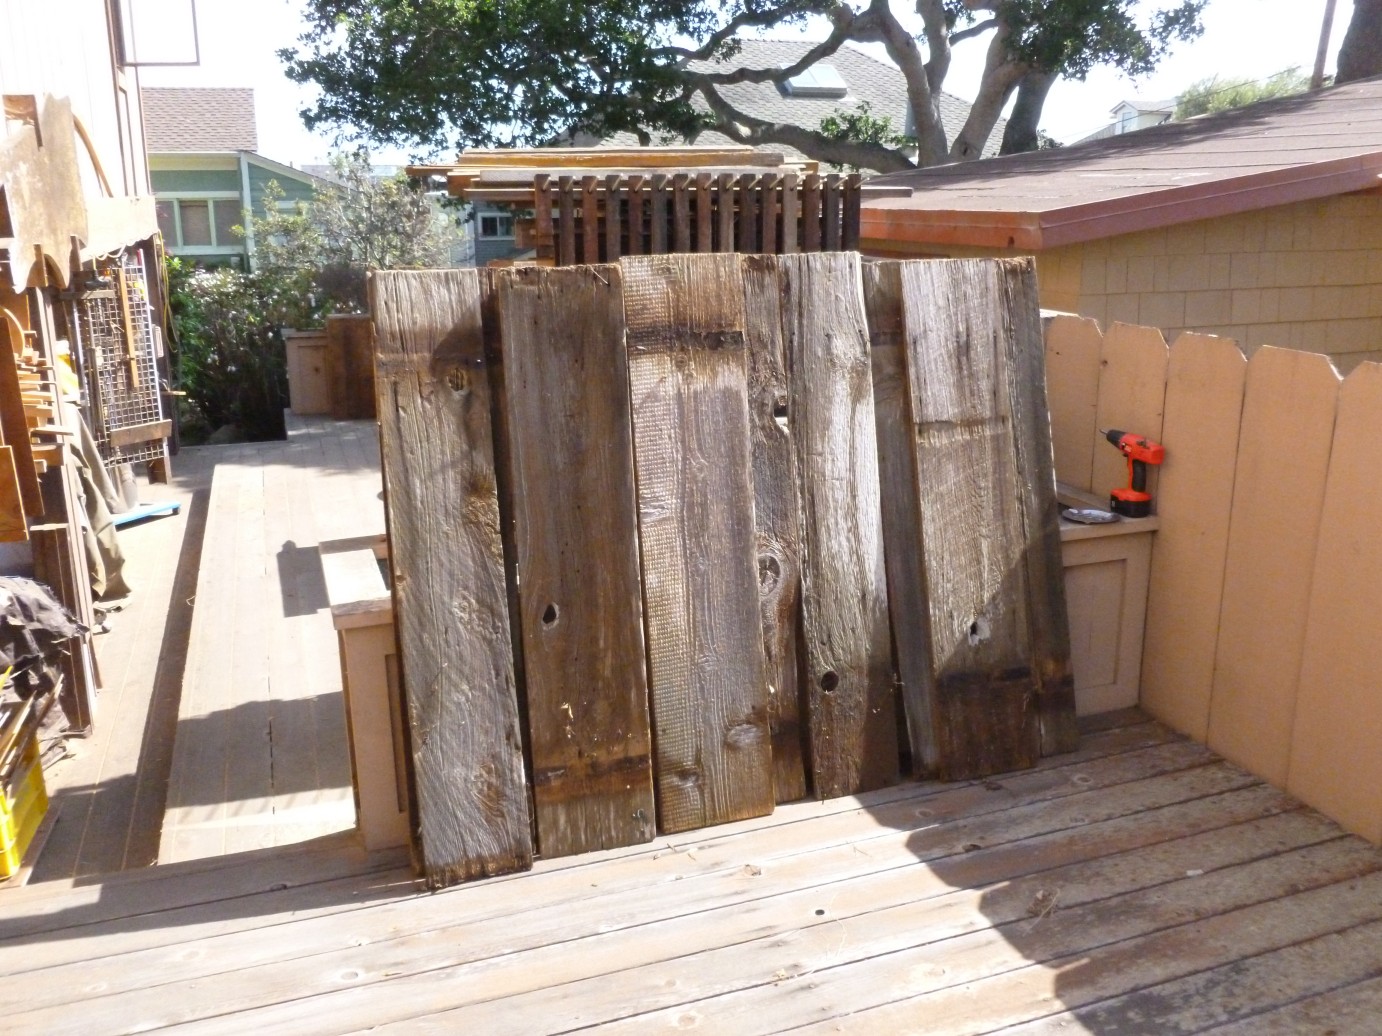 TDAY – Instead of trying for that nap, since the clamor of the gulls on the ground across the street at 6 got me up early, and since we’re replacing the face behind the Little Blue Cottage, I Broke Through and rolled with it.
And right glad I was that I did. I scavenged 60 Bf of weathered fence board, all of it looking like venerable barn planks. Hooray for our side. Swapped the Accu-Rip for it.
5 24 – Tentatively set out on the Valentine Card Wheel. Opted for half-laps on the joints, but dicked up the angle figuring that two 15 degree angles makes a 30 degree, which is what you and Pythagoras want in a 12-sided wheel. But I was butting an edge perpendicular to the long side of the wheel piece to a 15 degree angle and 15 plus noting equals 15.
And so there some backpedaling zarking out the parts.
Backpedaling cutting the parts down in length as the 15 cm parts produced a wheel over 50 cm in diameter.
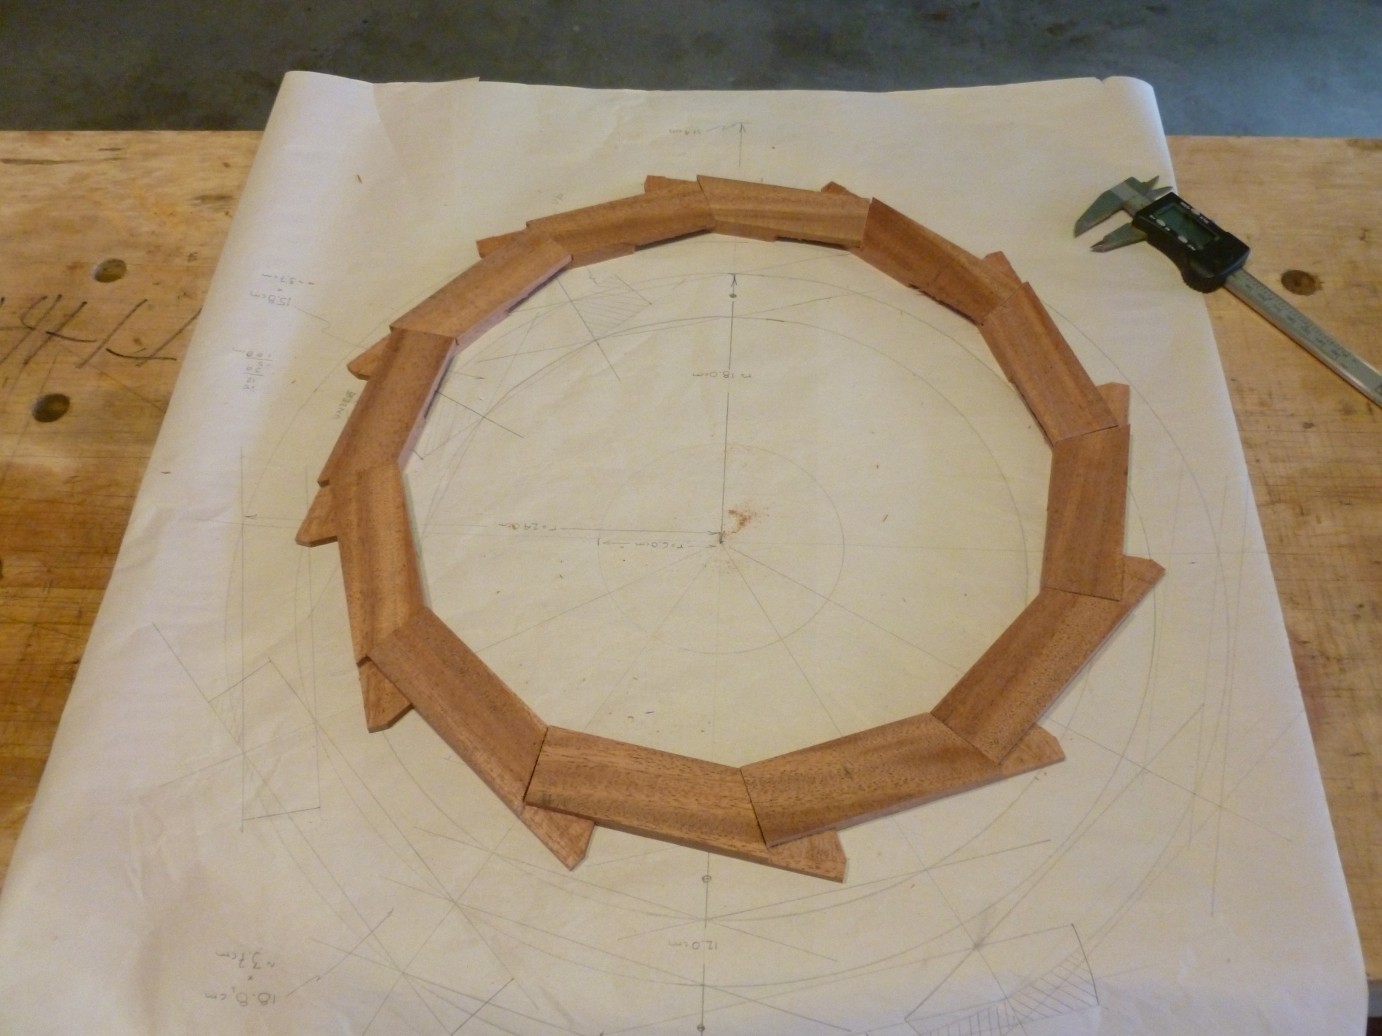
Form, fit, and no-function layout of one of the two Valentine Wheel wheels. Yes.
Backpedaling forming the second of two wheels – as I was roughing out the 12 parts for THE WHEEL, i though to myself: what was wrong with my math – I have far too much raw stock …..?”
Dry fit is ….. dry. Who know what this is going to look like. Send glue up instructions.
5 28 – The Ducci Travel Bar, Connecticut Version.
Bill Ducci, the skeet shooter for whom I built a three-bottle travel bar some months ago has requested a slimmed down version to his New England use (he oscillates between CT and SC).

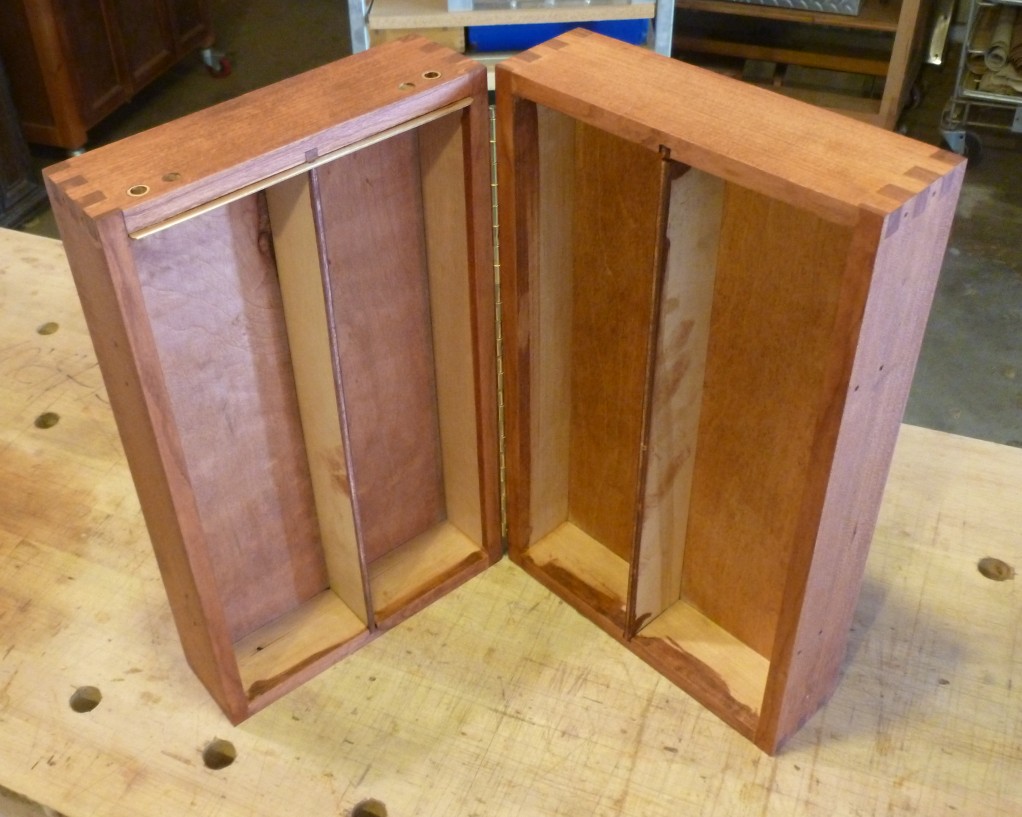
The Ducci CT Travel Bar in its early, gestational form.
In cherry, same box-jointed design, but tight to two bottles: Ketel One and Johnnie Walker. I suggested that I procure two identical, flat-sided bottles which would thus become the decanters and to avoid buying and shipping the hooch, to save costs.
This idea was met with approval and with no small effort finally found on Amazon some French 1 liter bottles with the 19th Century porcelain and wire bail closures.
The bottles arrived this day and so I could make sawdust.
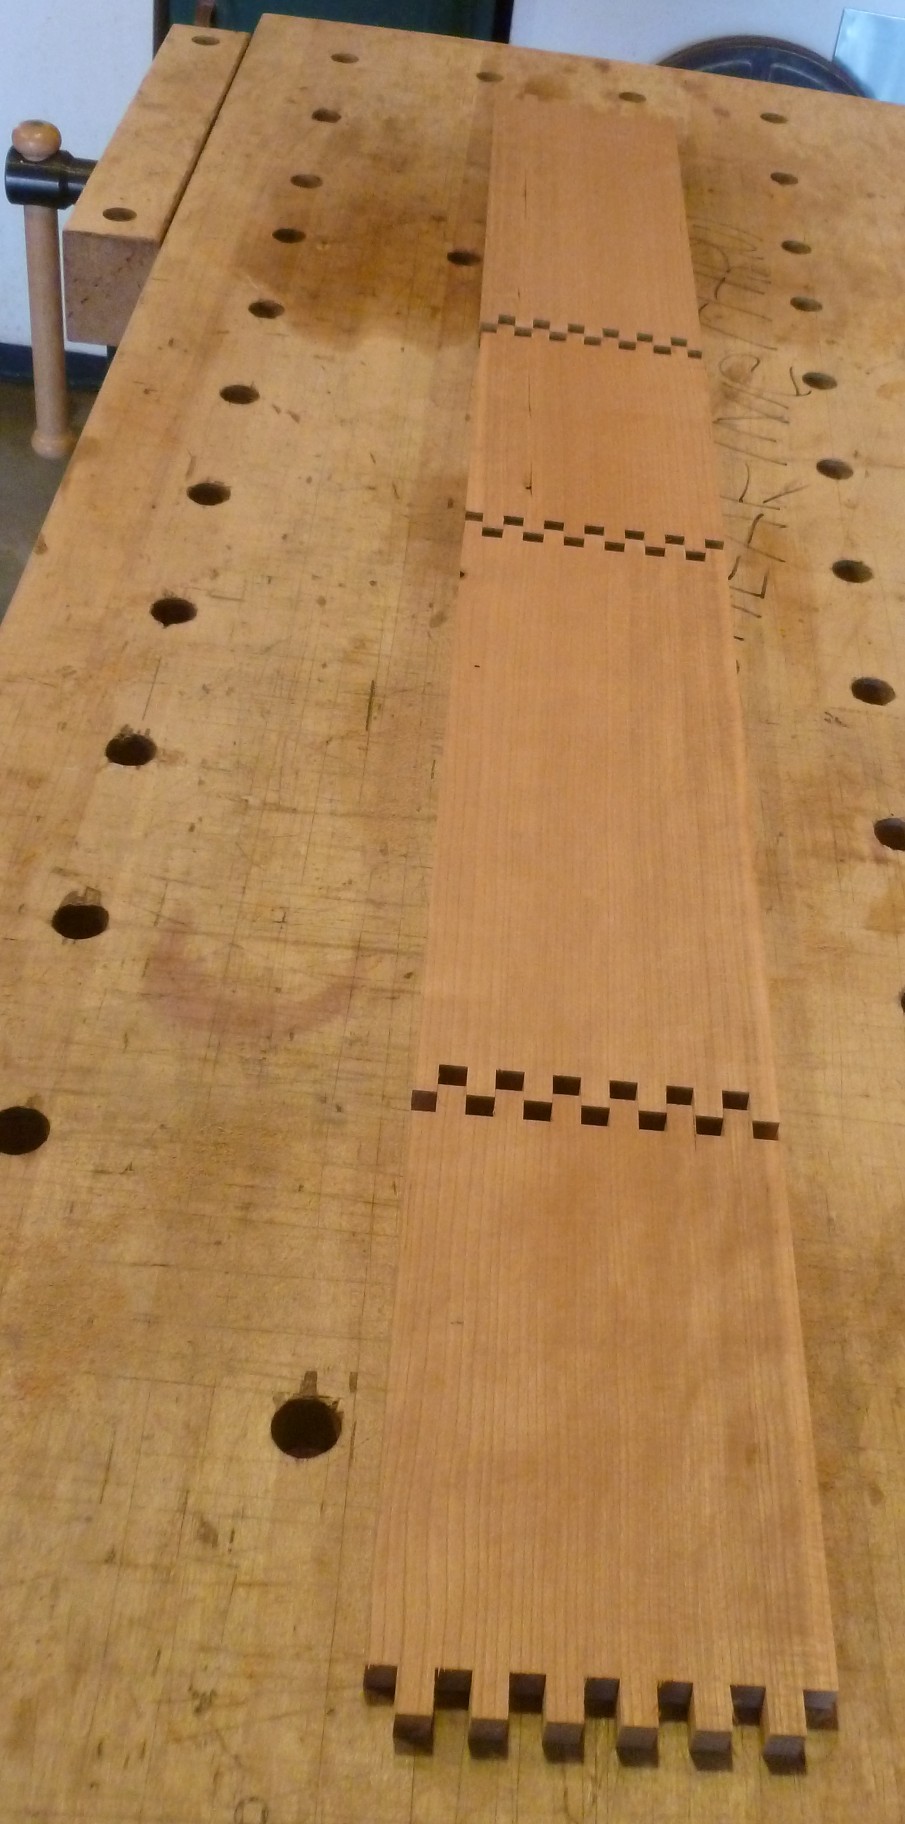
The Ducci CT Travel Bar in its box joint effected configuration.
Roughed out cherry, cut to length and width once dimensions determined based upon two bottles, cut for box joints on router table, kerfed for front and back, separated the two halves of the proto-box, kerfed for internal divider, formed two internal dividers, and formed the box front and back from 1/4” ply, stained ply (can of “RED ?”) which was the proper tone.
All inside of four hours. Which is half my time estimate.
GOODDAY – Waking up. Good.
The Prof doggie delivers their favorite mutt into my charge as they are off to The City for to take in a Giants Base-ball contest, then put son Milo onto an aircraft for to visit his maternal grandparents for a time.
I, for a time, invest into the Connecticut Case. Specifically, sand and assure almost-sound fit between the two case sides, and then pre-drill for the continuous hinge and latches. Still uncertain about the handle … will the threaded inserts pull out under dynamic loading?
Dunno. I’m taking a risk.
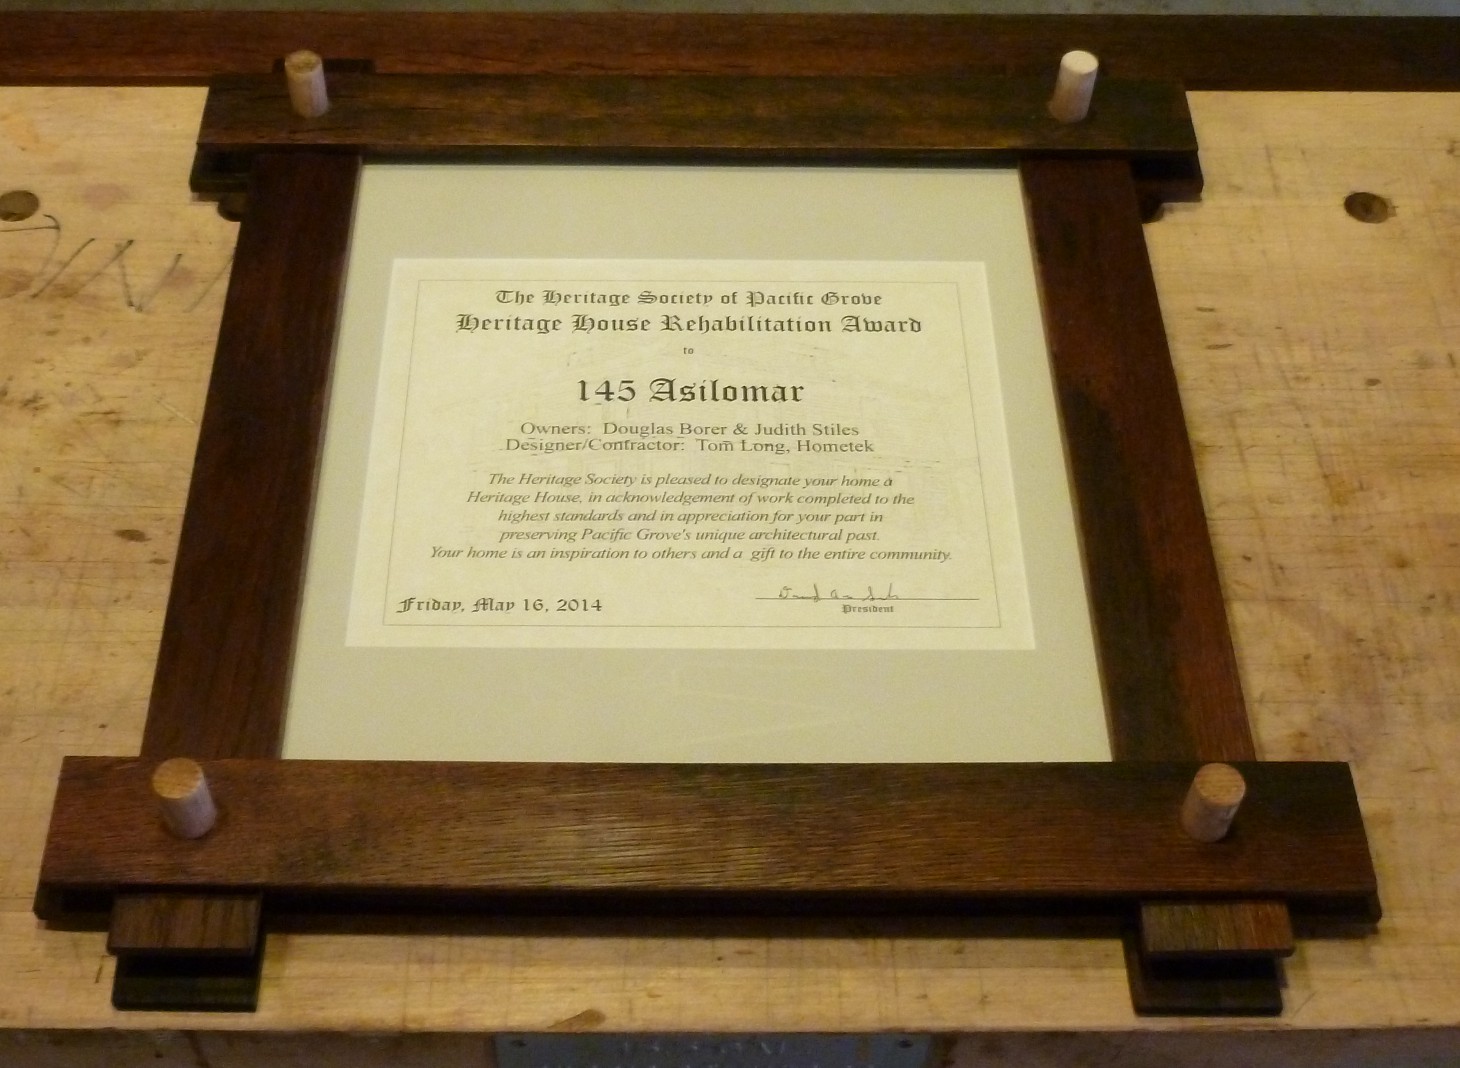
The Asilomar Frame formed from oak wine-flavoring staves …. mostly.
Devoted some time to finishing, except for the finish, which I predict will be merely mineral oil, the Asilomar Frame. Earthy. Craftsmanesque. Simple.
6 1 – While not actually Requirements Drift, as I was aware from the get-go that the client for the Connecticut Case was interested in an ‘exotic’ handle, the rejection today of my retractable handle means 1.5 hours wasted and re-work necessary. For an antler handle. Somehow. The how of which I currently do not know, but I’ll think of something.
The Retractable Handle: on the left in the deployed position; on the right the stowed position.
Handed off Gnuggies to her favorite Alpha Dog, the Prof, then set to finishing up his commemorative frame: excising glue exudate, holes in the back for hanging, final sanding, and then a coat of mineral oil. Done.
Next, further fun on the Valentine’s Ferris Wheel, specifically, now that the 1/4” dowels have arrived, drill same in each of the 25 parts that will, Odin Willing, form the wheel of the Wheel. Maybe.
6 3 – Ducci ixnay’ed my retractable handle concept for his two bagger travel bar, and so it was back to the antler and 2 hours of rework to tart it up.
I HATE rework.
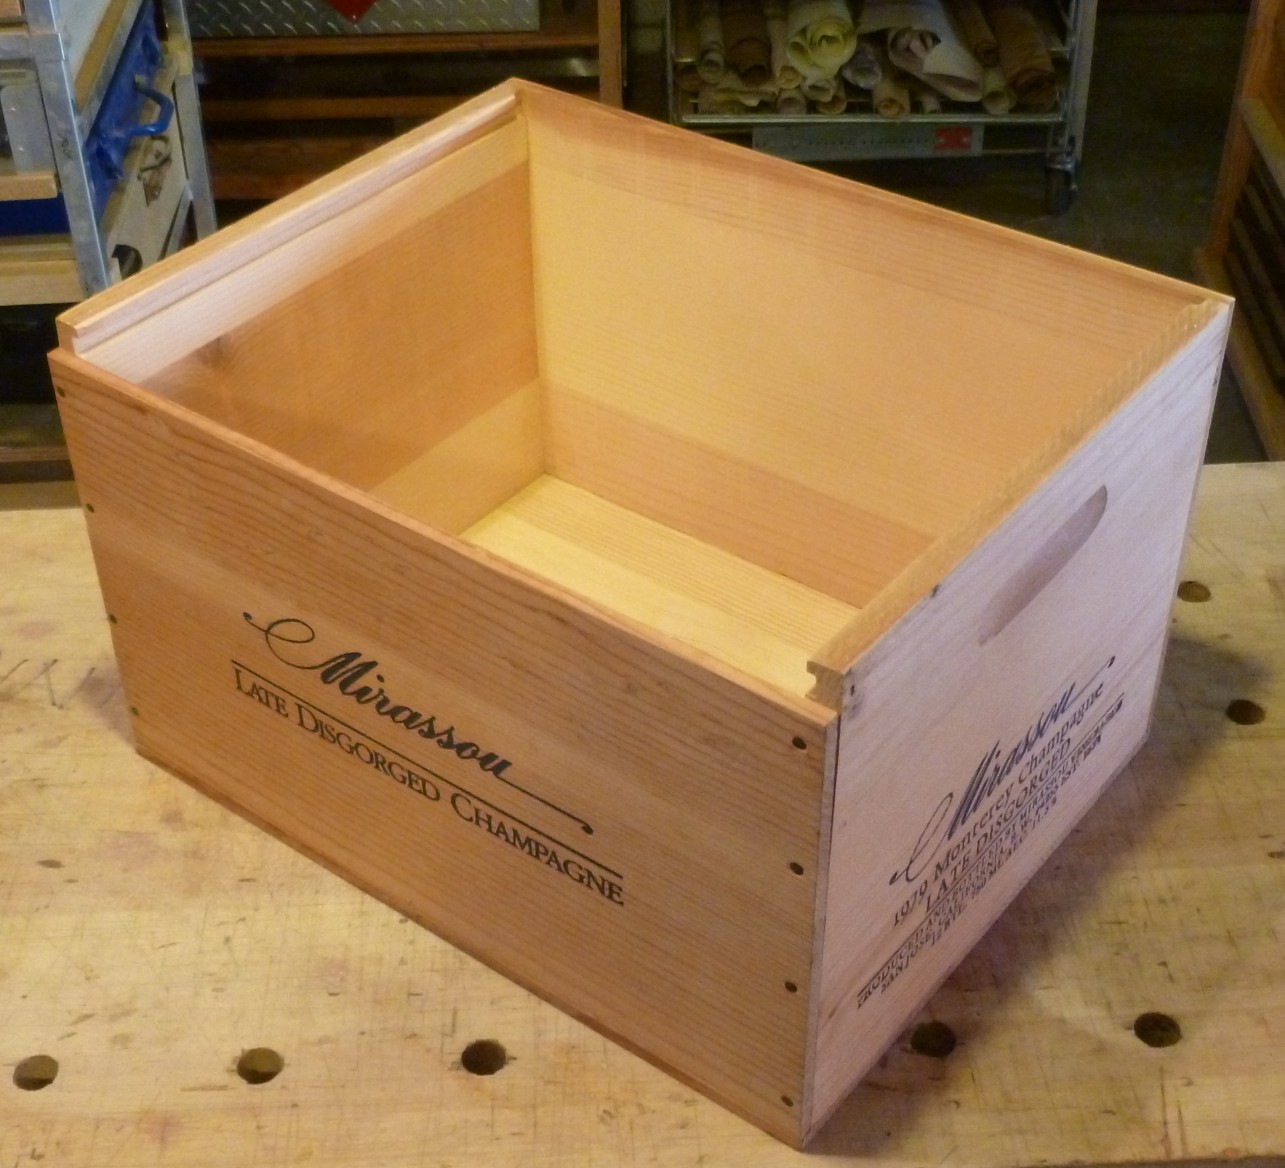
Here is the SMWC in its boring Before portrait.
Next, just as I’m wondering how to tart up SuperSmythe’s Mirassou Wine Crate (SMWC), arrives the roar of one of Rommel’s panzer divisions, or it was The Grape Stakes King in his Tiger, er Dodge Ram.
Bearing 400 oak flavor sticks. I’m happy to have them, I like looking at them all, I enjoy having them tell me what they want to become in their new role, and have storage space for 3/4’s of them, but I’ll think of something.
Thinking of something for the SMWC first involves pounding true all the nails, nails that will be cloaked by the copper trim I plan for all four corners. Sand the inside sides, not the bottom as likely I’ll line it with felt.
We now come to the sliding lid. It’s bowed. Can I flatten it? I drape it with a damp towel thinking to soften all the wood. 15 minutes later I glance over at it, it has not flattened, but gone the opposite direction, looks like a Quonset Hut. This is, as we say in the woodworking game, Is Not Good.
Inverting the Quonset Hut and keeping the wet towel I place weights on either edge in hopes that the wood will un-bow. This does happen, and then I put the lid inside my panel joining clamps in the also hope that when the dry, the lid will be flat.
If not, I have Plan B. Or will, if necessary.
Hinge attached, can now final sand to fit, which wasn’t necessary, and start layering on the urethane.
6 4 – At Ducci’s request, I lathered on – after final sanding – the two case halves some stain to deepen the cherry color. It’s like a guy who lavishes salt on his pizza; it’s just not necessary, but he wants it anyway.
Finally, I’m in End Game with this case 60% over (and in the end, likely 100% over) time budget at a fixed price. My only consolation is this: he’s a travelling salesman for JohnsonArts. After his skeet shooting, he and his cronies knock a few back, and so maybe one or three of them might like their own.
Onward to the SMWC where our crack Tart Up The Crate Design Team suggested a draw strip for the front of the sliding top. This satisfies two needs: one, a better grip for the sliding lid, and two, a bolster for the thin wood which will inhibit bowing, at least from side-to-side.
This glued on, cut the four corner trim pieces of copper and shined them up. Did NOT nail/glue on the baseboard, but DID flesh out a concept to hide the rear two upper edges of the trim: like an overbite, another bolster on the top of the sliding lid, back that will overhang the case sides and hide those edges.
Heady.
Even more heady, potential money arrives in the form of The Prof: can I make a frame similar to the Asilomar Heritage Frame for a news story our our associate Richard Rosen. Of course I can, but not by tomorrow for the Cavary/FOE meeting.
6 7 – Three projects worked on:
1. Ganja Man Frame – started with this because it embodied the most unknowns, minor details such as, Just How Am I Making This And What Does It Look Like? The flavor sticks talked to me, said, “Eh, bub, commeer. See, I want’s ya ta make two frames, a front an’ a back, both da same. Dey’ll be linked ta-gedda by spacers what ya’s need for ta make the gap inta which goes da glass, the pickture and a pad.
Okay, says I. What I really needed was 3/4” brads, but had none, and so I used the 5/8” nailing on the spacers to the back of the front, if that makes any sense, and then once the front and spacers have glue set, will nail on the matching back.
2. Put the hinge to the Ducci CT Case. This is always a hurdle because try as I might, the two case sides seldom meet true once the hinge is affixed.
And yet this time, magically, the two sides met with sufficient perfectness that I didn’t need to adjust with the sander. Odin Be Praised.
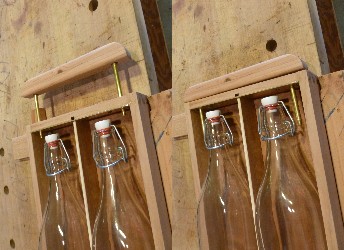
3. The Mirassou Wine Crate needs a [SEKRET] locking mechanism. Plan A was a sliding front trim piece with projecting brass rod and a compensatory L-shaped rout in the bottom of the front lid trim. But there was insufficient thickness in the front trim, and so it was on to Plan Next …. which was ….What?
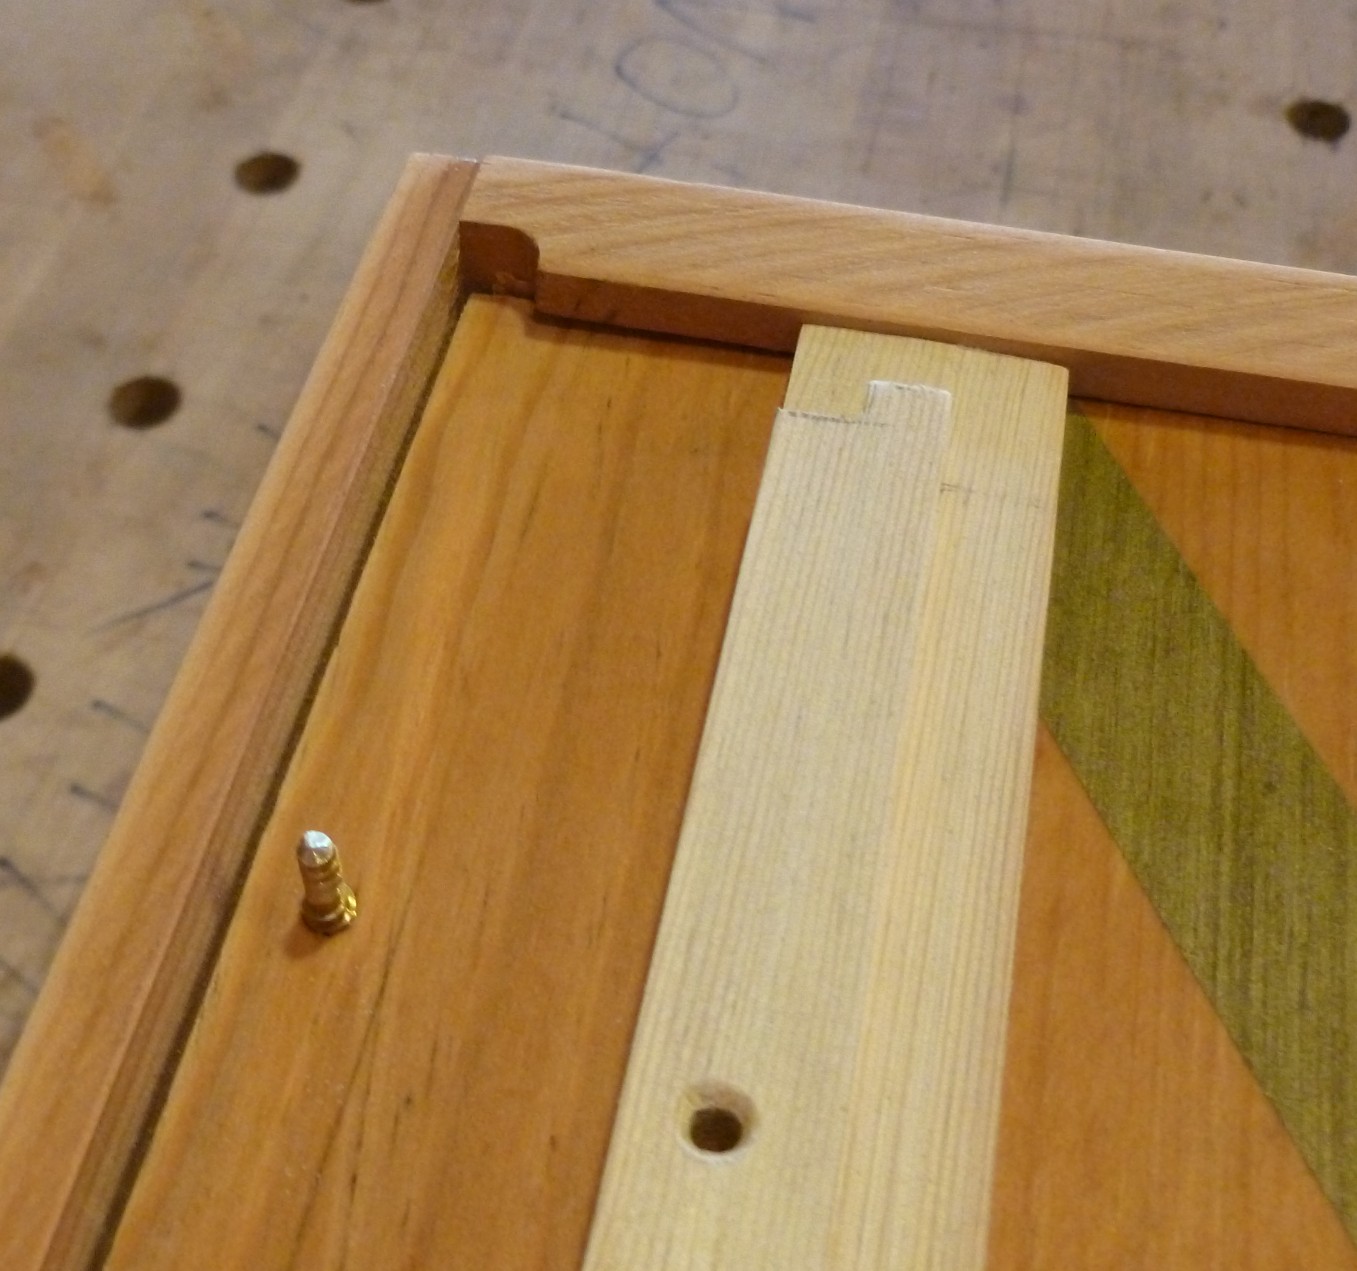
That slat on the right has its ends formed to insert into that cut-out at the top corner of the crate – the sanded-down screw fits into that hole and thus prevents the sliding lid from … well, sliding.
Somehow, it seemed that if I didn’t glue on the back lid trim, artfully cut out a portion to fit into the dippsey-doddle in the case rails and put in blind holes from underneath, and then some affix a brass rod or dowel that, when the trim is on the lid, it would prevent sliding the lid out.
And so it was. The only major question was about those dowels or rod – how to fasten them from underneath the lid and yet allow the free sliding of the lid. The lid is only about 3/8” thick, but I found a pair of brass screws with threads all the way to the head, and once the outboard threads were sanded off, this formed the locking pins.
It woiked. The only demerit is that the locking trim can be completely divorced from the case and lost. The best SEKRET mechanisms are always on-board and integral, but this was the best I could do. Today.
6 8 – Finished Rosen Frame, and it wasn’t simple. Got to rely on monkey glue, and a few screws. Hope.
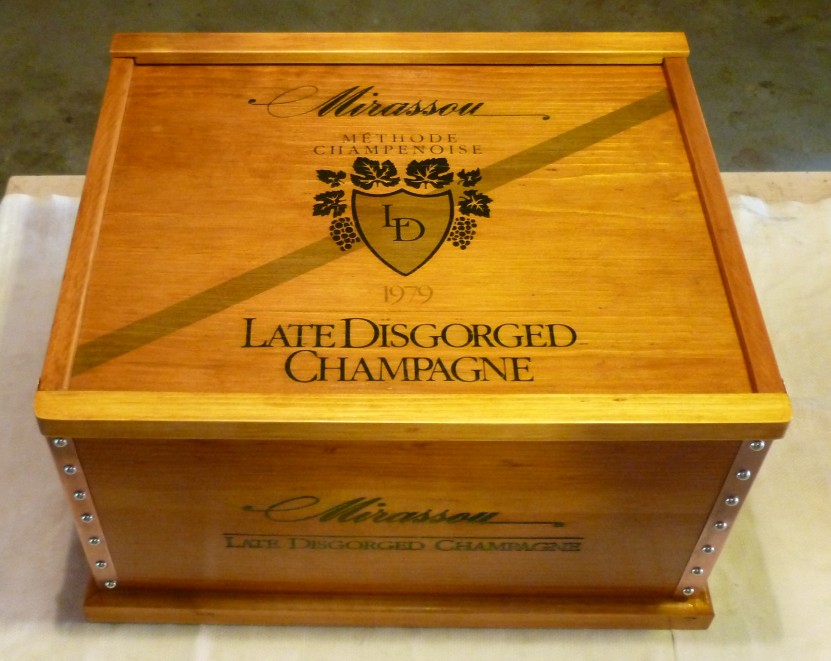
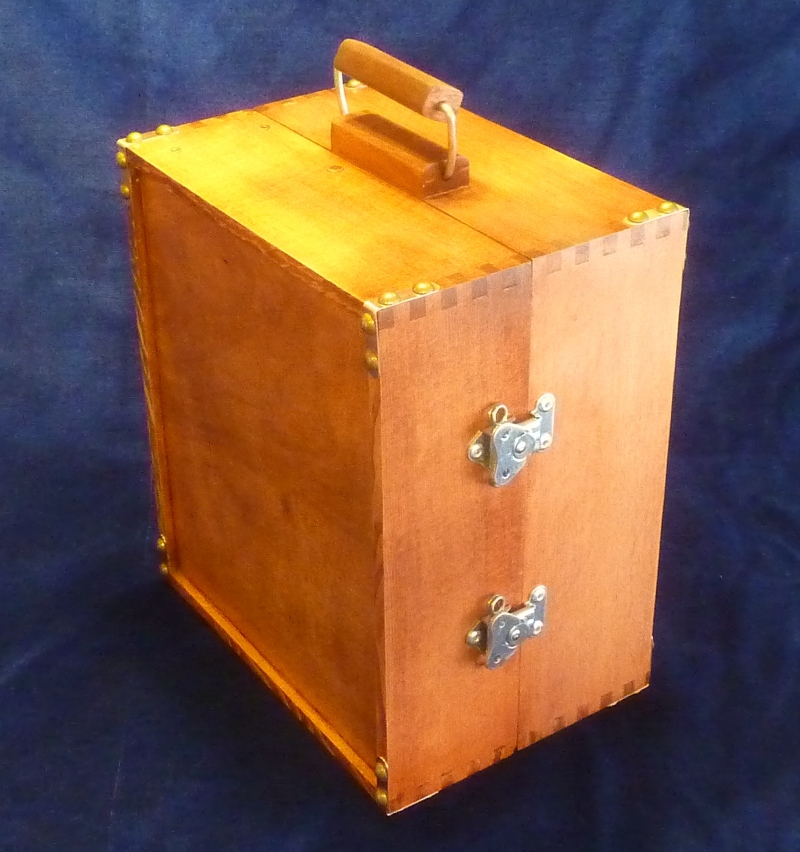
The SuperSmythe Mirassoui Wine Crate in its glorious After portrait – the inside bottom is lined with red felt.
Shellac on the SuperSmythe SMWC, three coats on the lid, looking good.
Three coats of urethane on the Ducci Case, shaping up.
An hour gluing up the split hatch cover for Hamilton, Main Salon, jig formation, estimation of oak slat stiffeners, my hinges won’t fit.
Drat.
Borer in of the evening, likes the Rosen Frame, I reckon.
6 9 – Five coats of urethane on the Ducci CT Case is enough.
Four coats of amber shellac on the Mirassou Crate Tart Up is enough.
Onward.

The Ducci Connecticut Case in its graduation picture.


 Double Secret Latch Box
  Mountain and Sky
  Contrast Flat File
No comments yet.